Starting a business is not hard but it does require a plan, a lot of time and patience.
If you're at the point where you're ready to make that commitment, and you need a website to get started but don't want to pay someone to build it for you then you're in the right place. I'm going to break down the steps involved in setting up a website.
Here's the step-by-step guide to get up and running:
Please note, some of the links on this page are affiliate links and I do earn a commission should you make a purchase using one of the links.

Step 1 : Choose a Domain Name
It took me a long time to come up with a unique, memorable name with a url that wasn't already taken.
Check to see if the domain you want is available by using a domain name checker, like this one by Network Solutions.
Get creative! Don't get discouraged. I've dreamed up and checked out literally hundreds of names only to find someone else had already dreamed up the same name and had already registered the url. So stay flexible here.
Note: Bluehost is the company I started with, it's cheap and gets you going. Once you build you traffic, you'll need to switch. I now host with BigScoots.
Step 2 : Set up Hosting
Once you have your domain name picked out, go ahead and sign up and follow the steps laid out by your hosting provider.
Step 3 : Choose a WordPress Theme
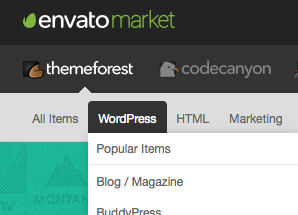
Being a web designer, I often use WordPress for my clients but I finally made the switch over for my own personal blog. I started with Blogger which is free, but there were so many limitations I finally decided I had to make the switch. If I had to do it all over again, I would have just started with WordPress. Let me tell you transferring 5 years worth of content over to a new site is not really that fun. So first you will want to find a Wordpress theme. There are lot of decent free themes you can use. I purchased a ready-made theme specifically designed for recipe bloggers from ThemeForest. It came with star ratings, a variety of page layout options, built-in social media sharing buttons and ad space. All things Blogger or other themes were lacking that I wanted. So, I'd recommend looking really thoroughly through the available themes at ThemeForest. (Make sure you are looking at WordPress themes only — see screen shot on the right.) I use the Food and Cook theme which I paid $58 for and it was totally worth having all those extra features in my opinion.
Step 4 : Install WordPress
Luckily WordPress is so mainstream now that Blue Host makes it really easy to install WordPress. Once you have your account set up, you just have to log into your control panel and there will be a WordPress icon there. Click that and follow the steps to get Wordpress installed on your server. Once that's done and you have your WordPress user name and password set up, you'll need to log into WordPress. This will be a place you'll be coming quite often so bookmark it! The link will be www.your-domain-name.com/wp-admin. By the way, I highly recommend you record your passwords somewhere safe. If you're running an online business will have a TON of different accounts you'll use on a regular basis as a blogger.
Step 5 : Install your WordPress theme
This is easy. Whether you opted for a free theme or purchased one from ThemeForest, either way you'll get a .zip file. DO NOT UNZIP IT. Trust me from experience, it won't work. All you have to do is, once you're logged into WordPress, hover over "Appearance" on the left-hand side list of links, and then click "Themes." Click the "Add New" button at the top of the page and then "Upload Theme" button. You just want to browse and select that whole .zip file and upload that. Once that's upload, boom! Your theme is installed.
That's it. You've official got a website! Next you need content. "Wait, what?" you ask. Well here are a few tips for that...
What to include on your website
The #1 most important part of a website is content. Content that adds value and content that sells whatever it is you are offering—products or services. So what qualifies are "great" content?
Professional photos. You can take your own, you can use free stock photos (I love Freepik) or you can purchase premium stock images (Check out Adobe's stock collection).
If you're taking your own photos, I recommend investing in a class or an ebook that will give you the basic principles of lighting and photography. You need professional grade photos or potential customers will not look at you like the professional business woman that you are. I personally learned how to take great food photos by investing in the Tasty Food Photography eBook published by Pinch of Yum a very successful food blog.
Write with purpose. Build out your pages and craft your message on each page with you reader in mind. Solve their problems. Offer valuable information. Then direct them to buy your products or services.
Need professional help?
Stuck or just need some guidance? I offer one-on-one business coaching services to help overcome your stumbling blocks.
I have 30 and 60-minute personal phone sessions available. To schedule a call or to inquire about cost, email me! You can also visit my creative services and consulting business website here: Mighty Creative.