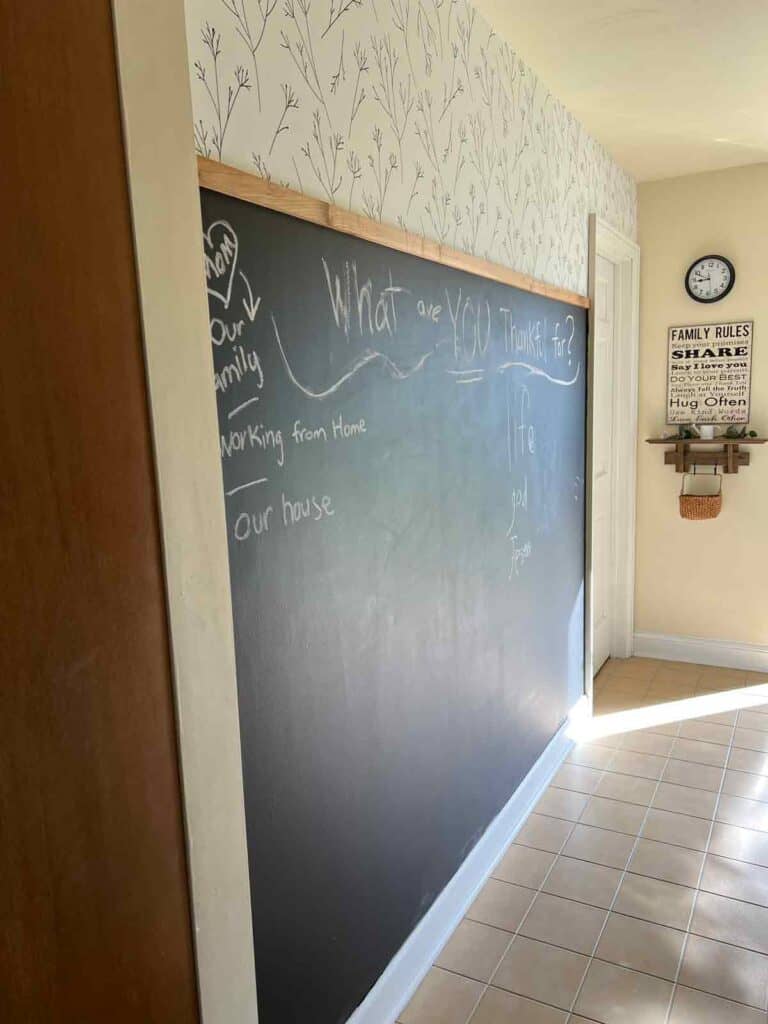
I'm going to show you, step by step, how to turn a hallway in your home or office into a large chalkboard wall!
This process includes: painting ¾ of the wall with chalkboard paint, adding peel and stick wallpaper above that, then finishing off with a strip of wood trim.
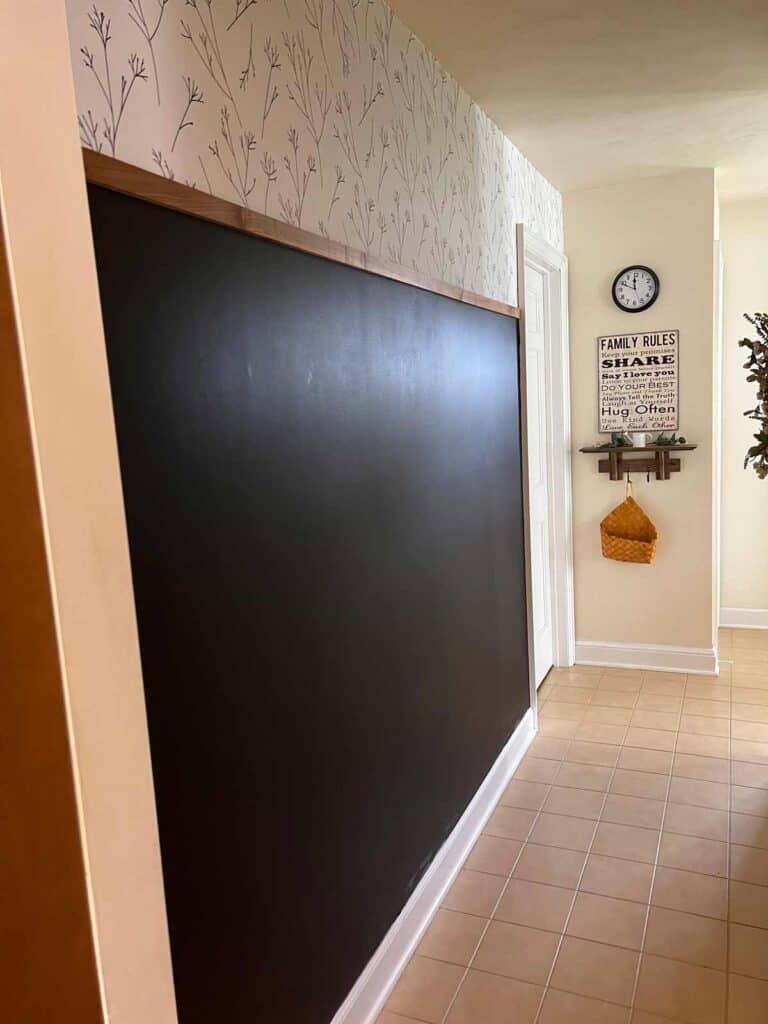
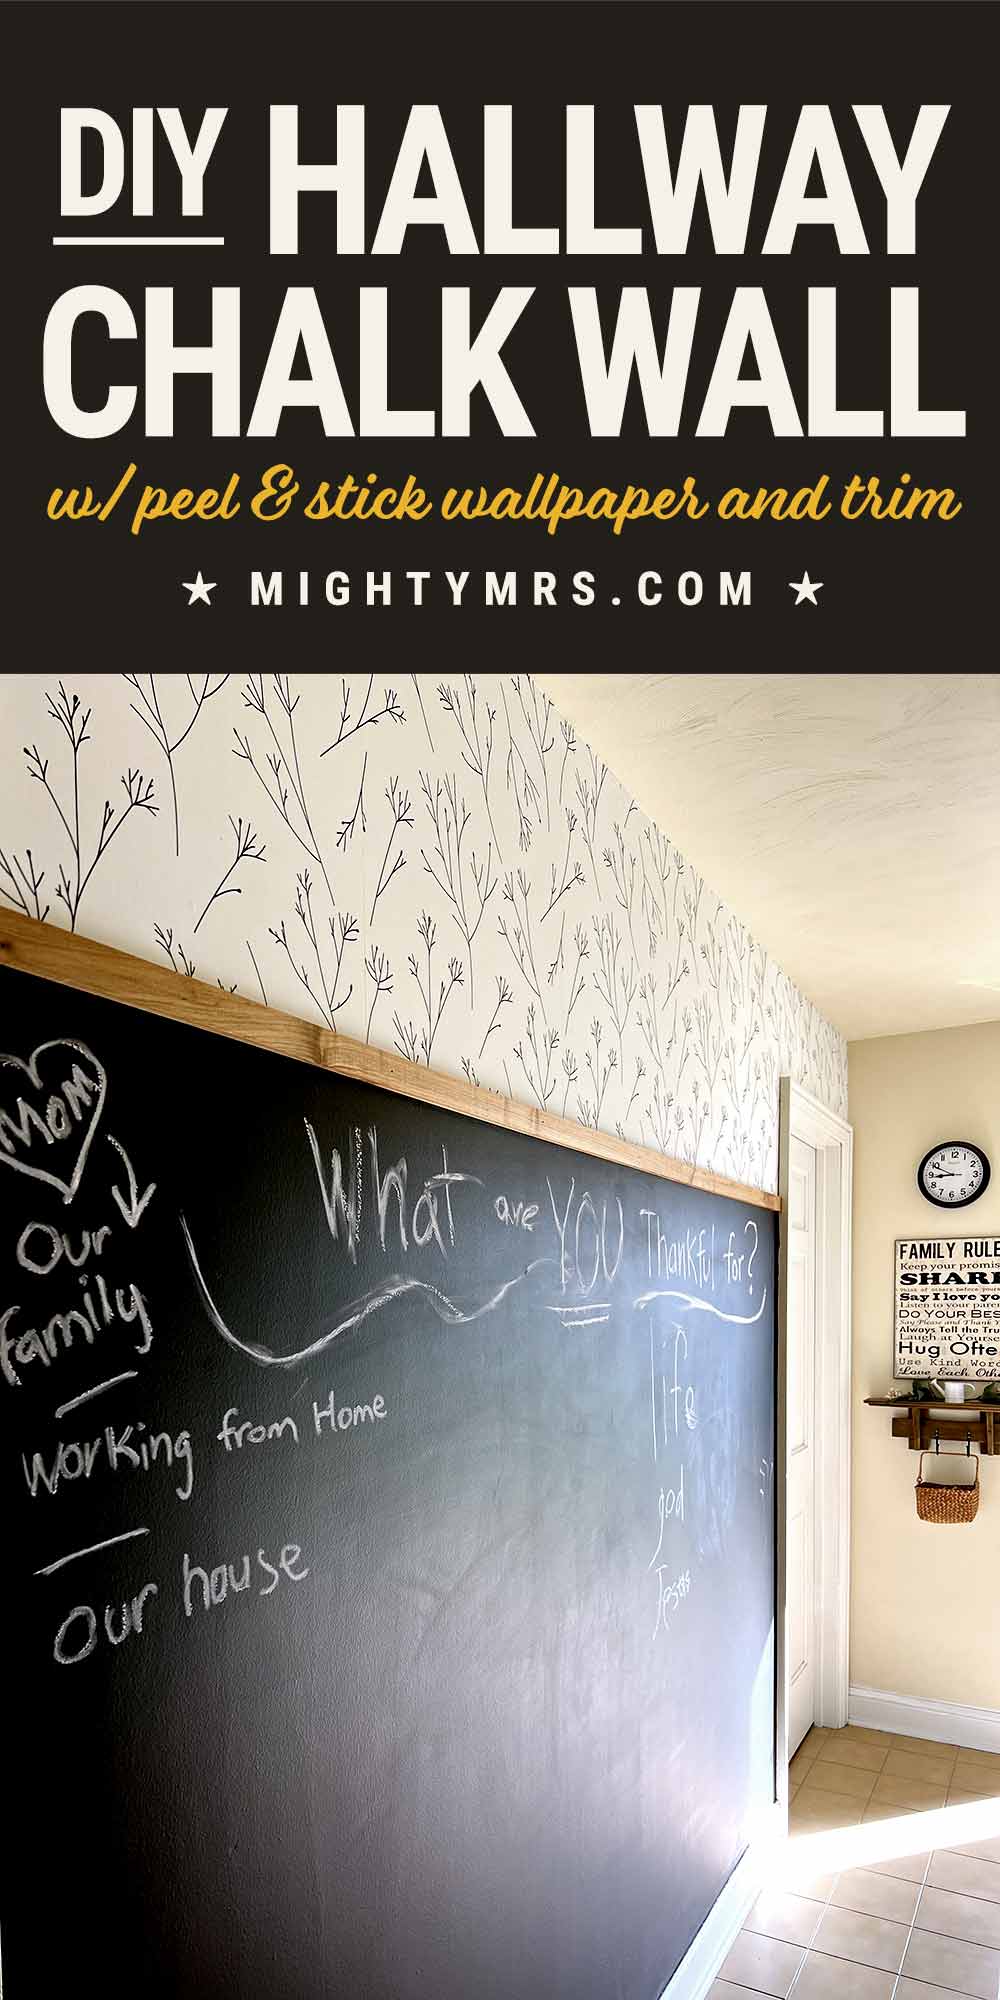
This design creates a large, functional chalkboard that kids and adults can both use but what I love most about this chalkboard wall is that it also adds character, charm and style to your home.
This is a very inexpensive project that you can easily do yourself! I'll list all the supplies you'll need and what steps to take.
★ Why You'll Love this Hallway Chalk Wall ★
Turning a hallway wall into a chalkboard is a great way to add beauty and function to an otherwise unused space. This tutorial shows you how to create a wall that is not only fun to write on, but also makes a lovely statement piece for your home!
By adding a small amount of easy-to-apply peel and stick wallpaper and a simple piece of wood trim, the chalkboard is beautifully framed, creating a much more sophisticated look than just a wall painted black with chalkboard paint.
You can use this chalkboard wall as a creative space for your family. We use ours to write birthday or special occasion messages, weekly themes to list what we are thankful for, dinner ideas, or to play games like Hangman and Tik Tac Toe. The kids' friends enjoy getting to write on the walls when they come over. It's been a big hit in our house and I think you'll love it too!
★ Materials You'll Need ★
Here's everything you need, start to finish to create this hallway chalkboard wall:
- A damp rag - to clean away any loose dirt from the wall.
- Sandpaper or a sanding block - Use a fine grit sandpaper to go over the whole wall to smooth it. This will make for a smooth surface when you go to write on it with chalk and will also help the paint adhere to the wall more evenly. For bigger bumps in the wall, try a heavier grit sandpaper then finish with fine.
- Measuring tape - You can eyeball how high up you want your chalkboard paint to go or measure. I eyeballed things but you may be more comfortable measuring and drawing a straight line horizontally across your wall to use as a guide when filling in the bottom ¾ of the wall with paint.
For reference, from the top of the baseboard to the bottom of the wood trim measures 63" high on my wall. - Chalkboard paint - I really like Rustoleum Chalkboard Paint, but I haven't tried other brands.
You will need two coats. And you will need to let the first coat dry for at least 4 hours before you put the next coat on. I read reviews about this paint and also noticed first hand that if you do not let the paint dry all the way before you attempt to add another coat, the paint can actually peel off of the wall and get stuck onto the roller.
So be sure to work that drying time into your plans. I know it's hard to wait but it'll be worth it! - Paint tray and roller - a medium grade, regular paint roller works great. I used a disposable paint tray for easy clean up.
- Angled paint brush - a 1" angled, good quality brush is great for going along the edges of the wall and trim. I splurged for a good quality brush so that I did not have to use tape. I prefer to just go slowly and push the paint into the edges. If you prefer to tape your edges and the trim, go for it! Be sure to use painters tape.
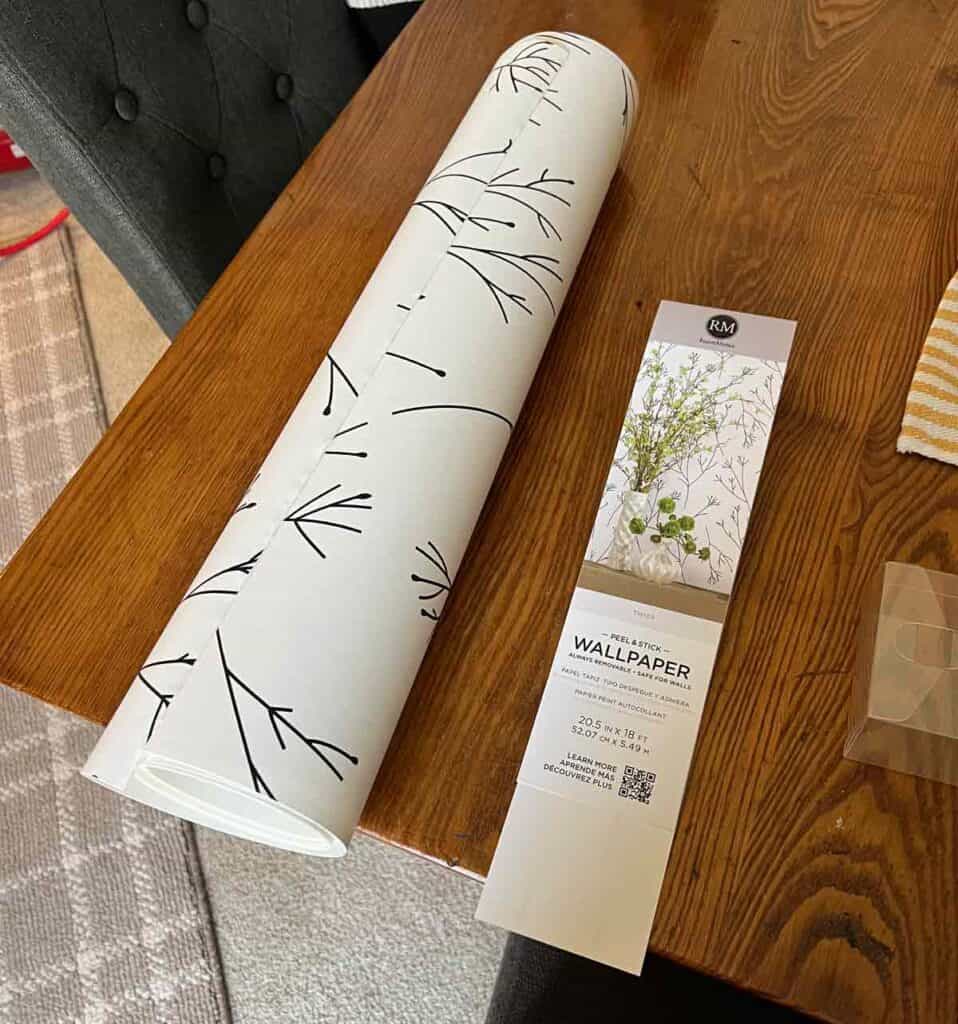
- Peel and stick wallpaper - I only needed one roll to do my whole hallway. Depending on the size of your wall and how the pattern matches up, you may need more. There are a ton of beautiful patterns to choose from! Shop peel and stick wallpaper on amazon
I used RoomMates Twig pattern peel and stick wallpaper. You can buy it on amazon or I found a roll at the Walmart near me.
- I've also used the brand NuWallpaper. It's peel and stick as well. Both brands were very easy to work with and have held up well with time. I have an accent wall of NuWallpaper in the Folk Tulip pattern in our downstairs half bath. I love it! You can buy the Folk Tulip pattern from amazon.
Or shop all NuWallpaper patterns on amazon. - Wood trim - this comes in 8-foot lengths at Home Depot or Lowes. I went with a hardwood that had some character to it. I liked the few little knots it had it in. I pulled out all the pieces they had in stock and picked my favorite. It was fun!
- Wood stain - We have a lot of oak in the house so I wanted to keep the stain pretty neutral to match that. I also think the natural wood color contrasts nicely with the black paint and white wallpaper above. Go with any wood stain color your heart desires or one that compliments your wallpaper.
- Foam Brush. I just brushed the stain on with a folded paper towel but you technically should use a foam brush. (I just forgot to buy one).
- Finishing nails - These are long, slender nails that aren't super noticeable.
You will need a hammer or use an air compressor to shoot these into the wall where there is a stud. So, you will also need a stud finder. - Wood filler. The hole from the nails is very small but if it bothers you, you may also want to also pick up some wood filler in a color that matches your stained wood. I didn't bother with it but just want to mention this in case you're more picky than I am! (Nothing wrong with that!)
- A level. A simple level will do. This will help make sure the piece of trim is level on the wall before you nail it up. Shop levels on amazon
★ Step by Step How-to ★
Step 1: CLEAN.
Clean the wall with a damp cloth to remove loose debris.
Step 2: SAND.
Lightly sand the entire wall and wipe with a damp cloth to remove dust.
Step 3: PAINT EDGES.
Using the angled brush, dip brush in chalkboard paint about ½ way up the bristles, wipe off excess paint on the side of the can to prevent drips. Slowly press the paint brush into the corner of the wall or along trim and drag downward or from one side to another if working along the baseboard. Create a full border for your chalkwall that you will next fill in with the roller. Keep in mind you can always go back and touch up areas you missed.
Tips: Go slowly! If you spill paint, wipe it up immediately with a wet rag or paper towel. Put just enough paint on your brush so that it's not dripping to prevent messes.
Step 4: PAINT WALL.
Once you have your border painted, fill the paint tray with chalkboard paint. Coat your roller evenly then slowly roll the paint onto the wall. Go top to bottom, left to right until the whole wall is coated. You will be putting on a second coat so don't stress if the coverage looks uneven but do try to get as much coverage as you can with the first coat.
You must let the first coat dry at least 4 hours. I recommend doing the first coat at night, then putting on the second coat the next day.
Warning: If you do not let the first coat dry long enough and attempt to roll on the second coat, the first coat can start to actually peel off of the wall back onto the roller.
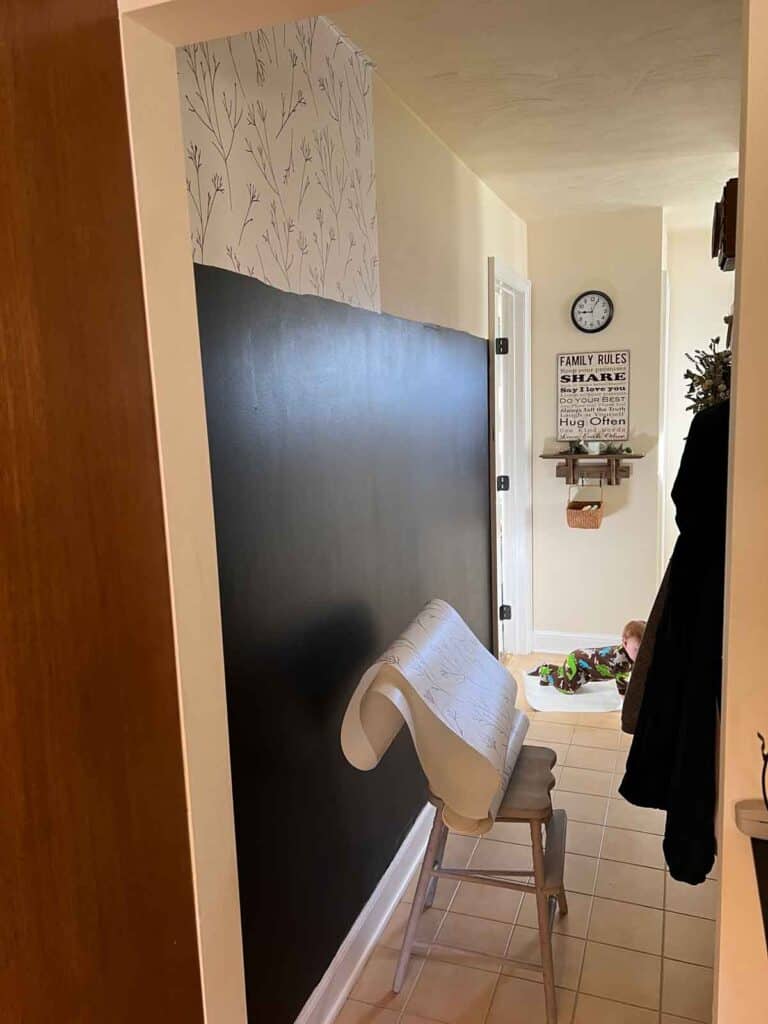
When you're done with the second coat, the wall might look something like this:

Step 5: HANG WALLPAPER.
This is the tricky part, but don't worry, just go slow and even if this is your first time hanging wallpaper, you'll be able to get it done! I got it done in one morning with a baby crawling under my feet so you can do it too!
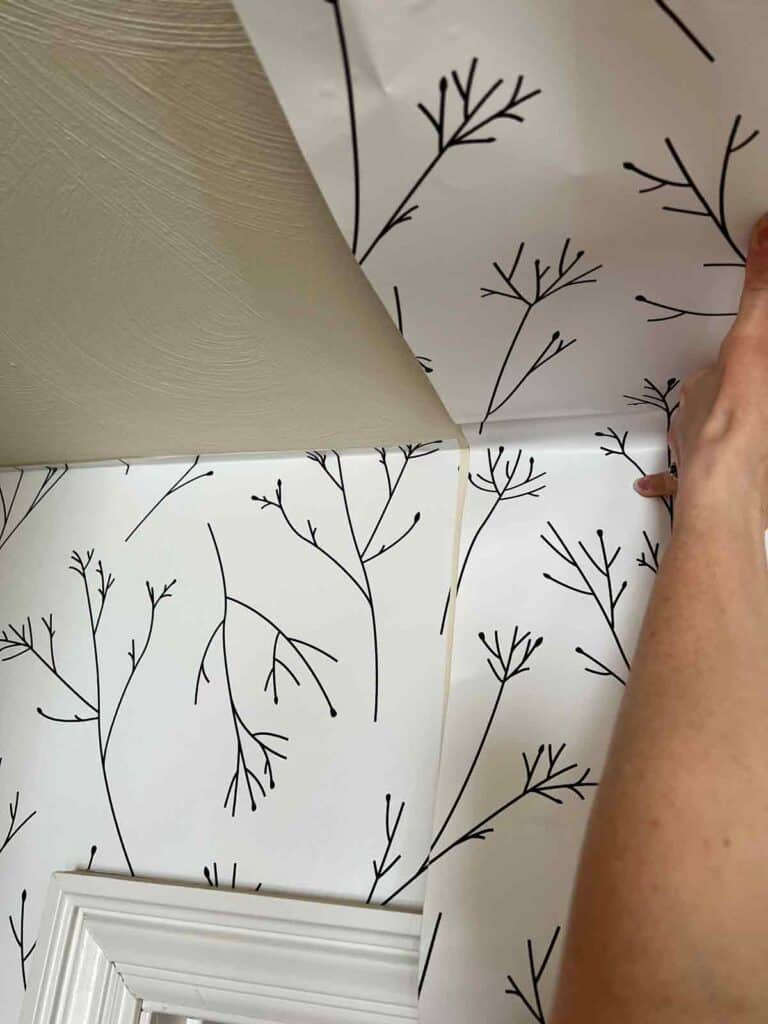
Start at the top left corner of the wall. Unroll the wallpaper and hold it up to the wall with the top of the roll flush with the ceiling. Do not remove the backing yet. You are just measuring your first piece to hang.
Cut the wallpaper 1" passed where the chalkboard paint begins to be sure you have a long enough piece. Peel the backing off of the piece you just cut and using the left edge of the wall and the ceiling as a guide, apply the first piece squarely to the wall. Apply the piece by pressing the top left corner and then slowly smoothing the wallpaper flat to the wall. If it starts to look off-kilter, or wrinkles, slowly peel it off and begin again.
Tip: Smooth and press from the top left corner to bottom right. Align left side of wallpaper to the wall. In case your walls are not square, you can always trim any extra away from the ceiling since we'll be doing that anyway as we add more strips of wallpaper.
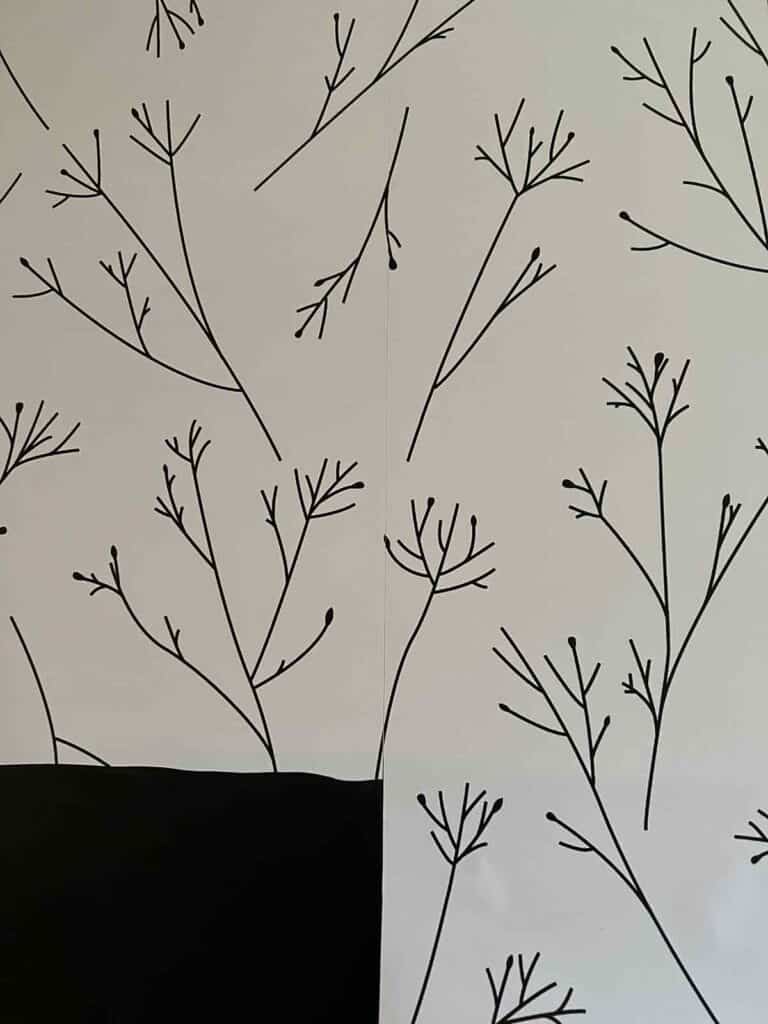
Once you get the first piece of wallpaper up, go back to the roll and you'll need to match up the pattern before you cut this second piece. You may have to cut off and waste a good bit of the paper in order to match the pattern unfortunately but it is what it is.
You'll have a faint seam but don't worry from a distance, you won't notice it. Keep in mind you don't have to cut perfectly straight across the bottom either since we'll be adding wood trim on top of where the chalkboard paint meets the wallpaper.
So, match up the pattern before peeling off the backing. Then you want to trim any excess off the top just to make the piece easier to work with when applying it to the wall. Leave about 1" extra at the top just to give yourself something to work with in case you need to adjust the alignment as you press the piece to the wall.
Once you trim the excess off the top, trim the bottom, again leaving an extra 1" or so at the bottom just in case.
Once you have the second piece cut, peel the backing and, lining up the pattern along the seam, press and smooth onto the wall. Go slowly to make sure the seam and pattern is aligned.
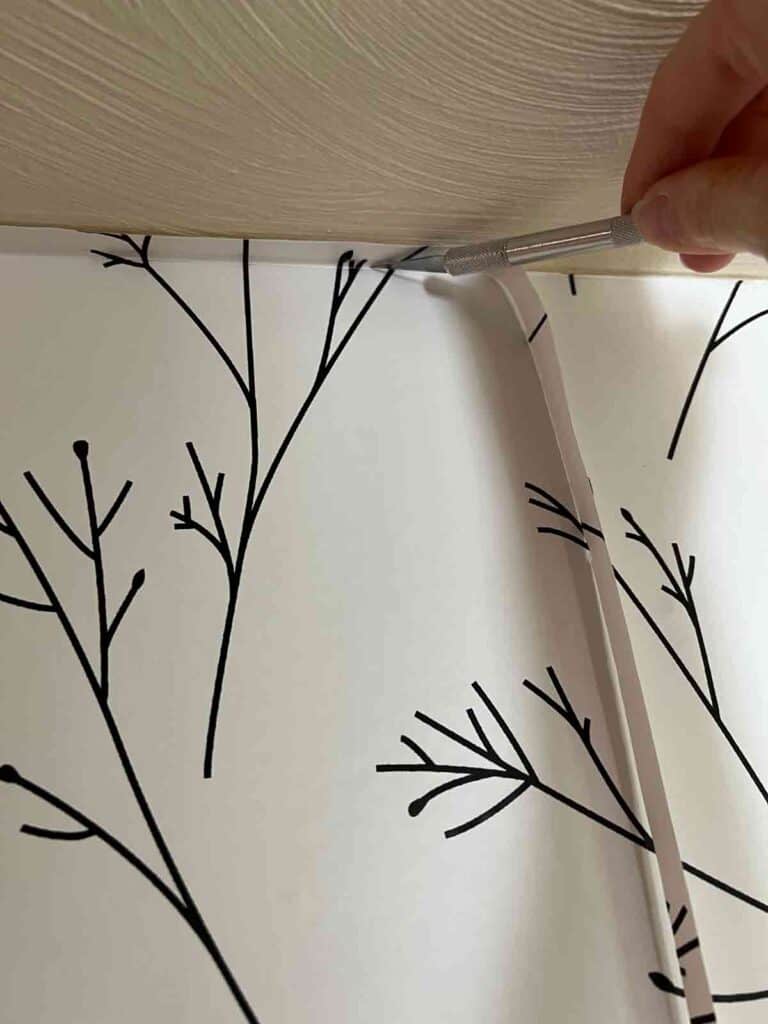
Press the extra at the top into the corner of the wall and ceiling. You'll go back and trim off the extra at the top when you're done with the full wall. You can use your fingernail to crease a crease that will be easy to see and trim to, later.
Keep following this process until you finish applying paper to the entire wall.
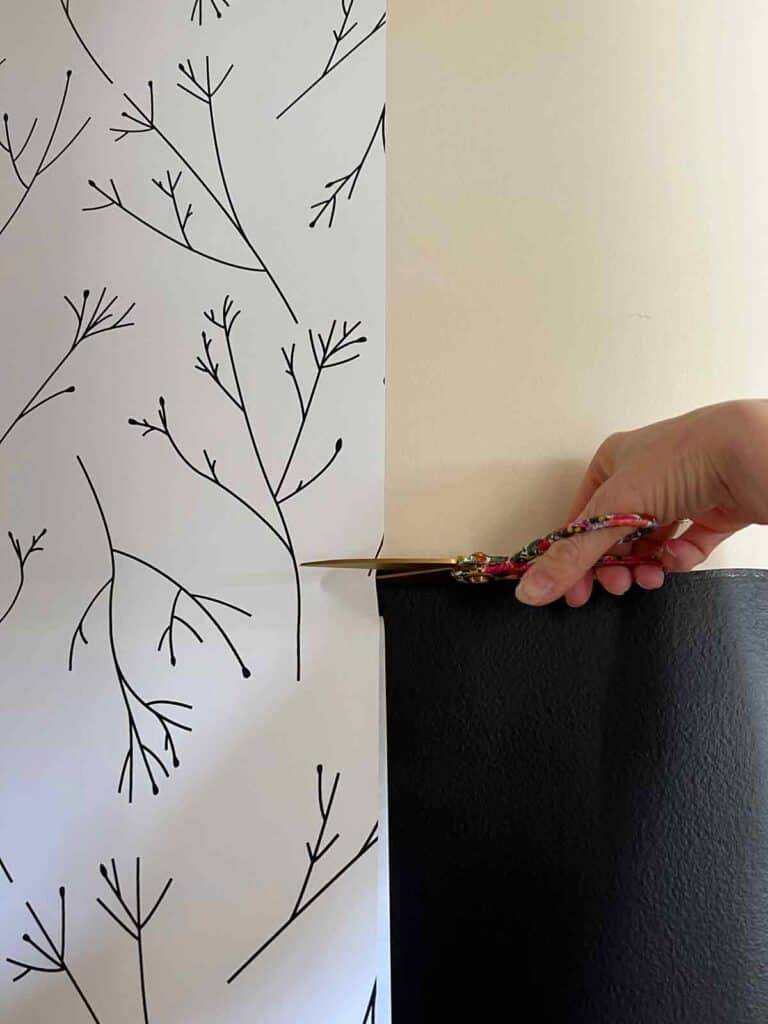
If you need to trim the final piece on the left side to fit the width of the wall, I found the easiest way to do this is to apply the full piece onto the wall and press and smooth into the corner of the wall just like you did with the ceiling. Then use an x-acto knife to lightly and slowly cut the excess paper away.

Use the same technique to trim away any excess paper between the wall and ceiling.
Just go slowly and press lightly. You can go from right to left or left to right, whichever is more comfortable for you.
Step 6: PREP THE TRIM.
CUT. First you'll need to cut the piece of trim to fit your wall. You can actually have Home Depot or Lowes do this for you when you buy the trim if you don't own a saw. Just make sure to bring the exact measurement of the width of your wall space where the trim will go.
If you want to DIY the cut, you can use a powered saw or even a simple mitre box and saw will work to cut trim.
SAND. Once the trim is cut to size, you will want to give it a light sand on all sides to help prevent splintering. Wipe away saw dust with a damp cloth then you're ready to stain the trim.
STAIN. You can choose any color stain. The stain simply adds color to the wood and in most cases helps bring out the natural grain of the wood. You can apply stain with a foam brush or I just used a folded paper towel to wipe it on. Let dry according to the directions on your can of stain.
I chose Minwax wood finish as it seals as well as stains all in one step. Easy!

Step 7: HANG THE TRIM.
This is the final step! To hang the trim first locate the studs in the wall using a stud finder. Mark the wall — you can use chalk on your new chalk wall!
You may want to get someone to help you with this. Have this person hold the trim on the wall. Then, using finishing nails, tack the trim to the wall. One nail per stud.
Now step back and take in the beauty of your beautiful, new chalk wall!
This chalkboard wall tutorial was featured on South Your Mouth!Redfin!

★ Save this idea! ★
Be sure to Pin this for later when you're ready to tackle this project!


Leave a Reply