Skim by Section
★ Why You'll Love this Recipe ★
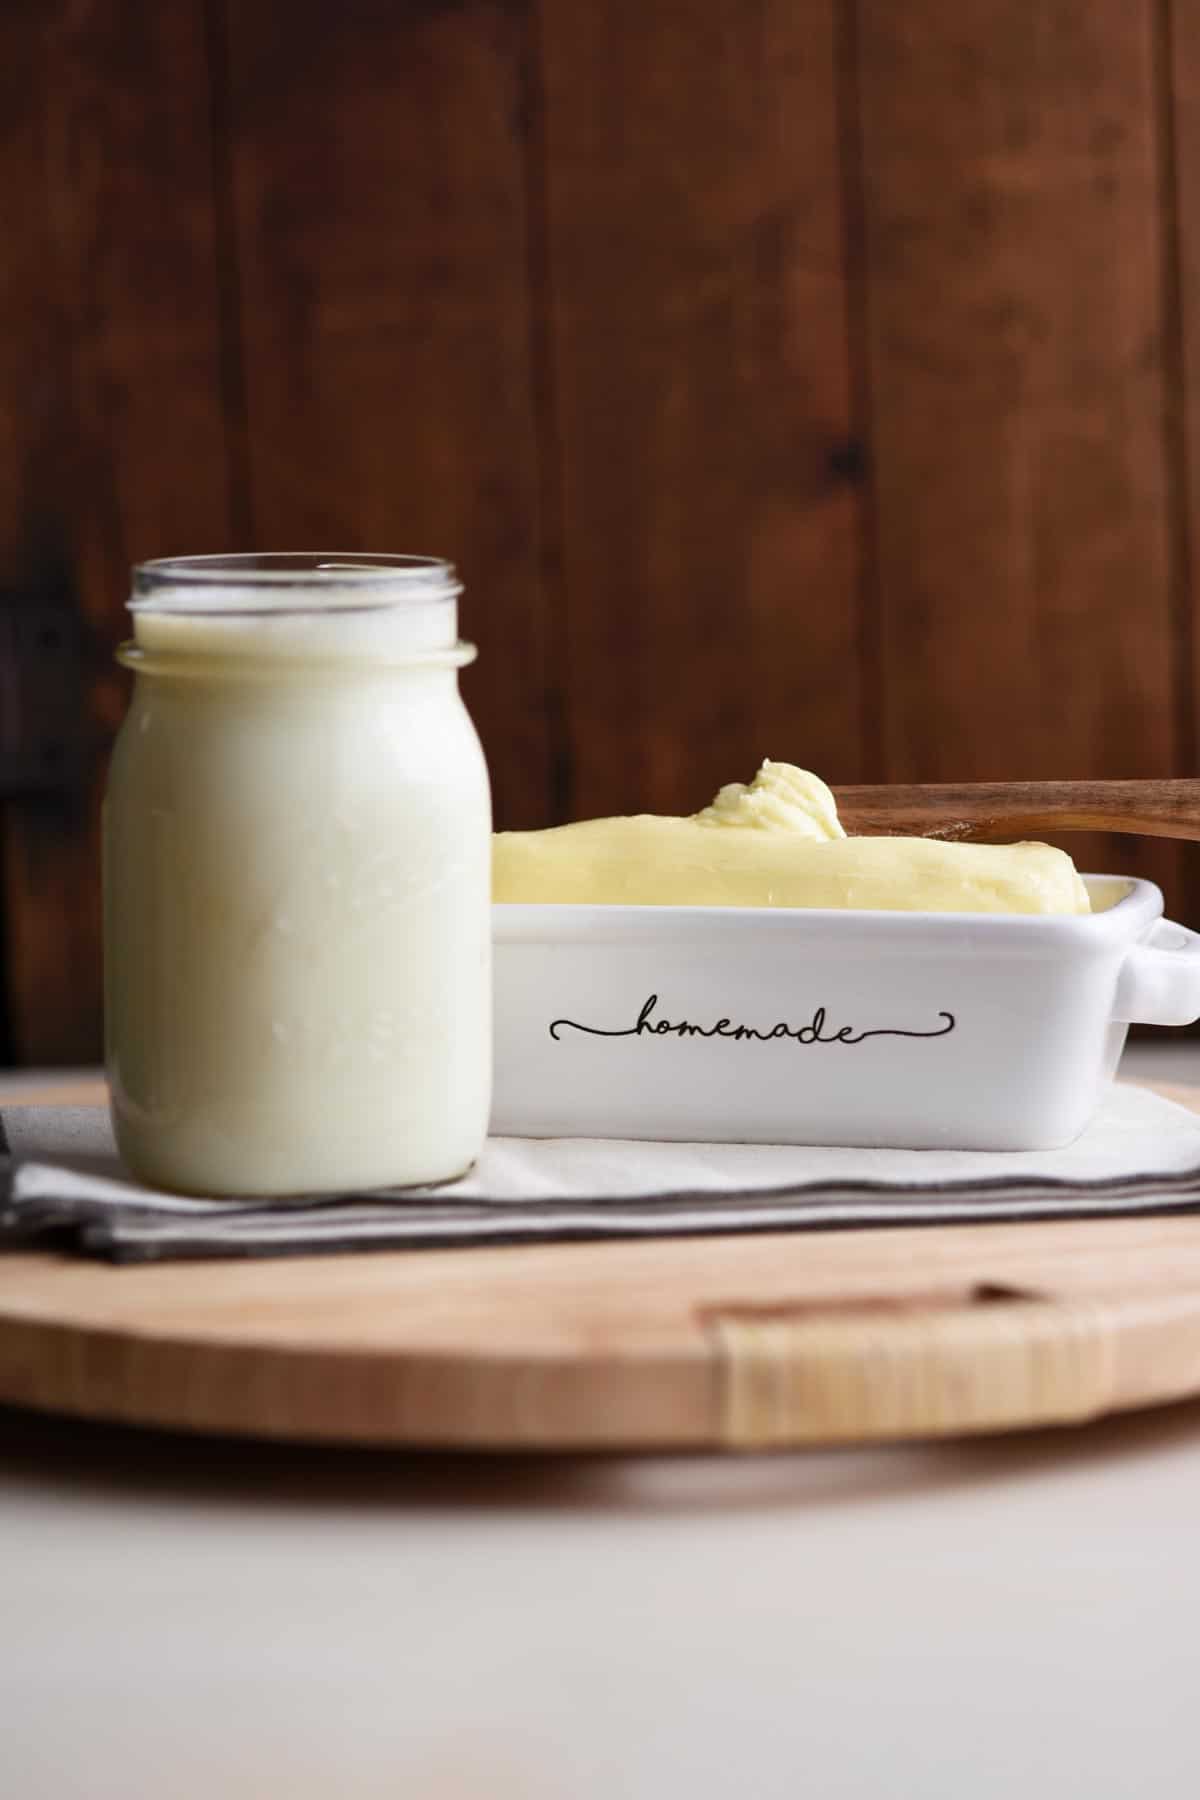
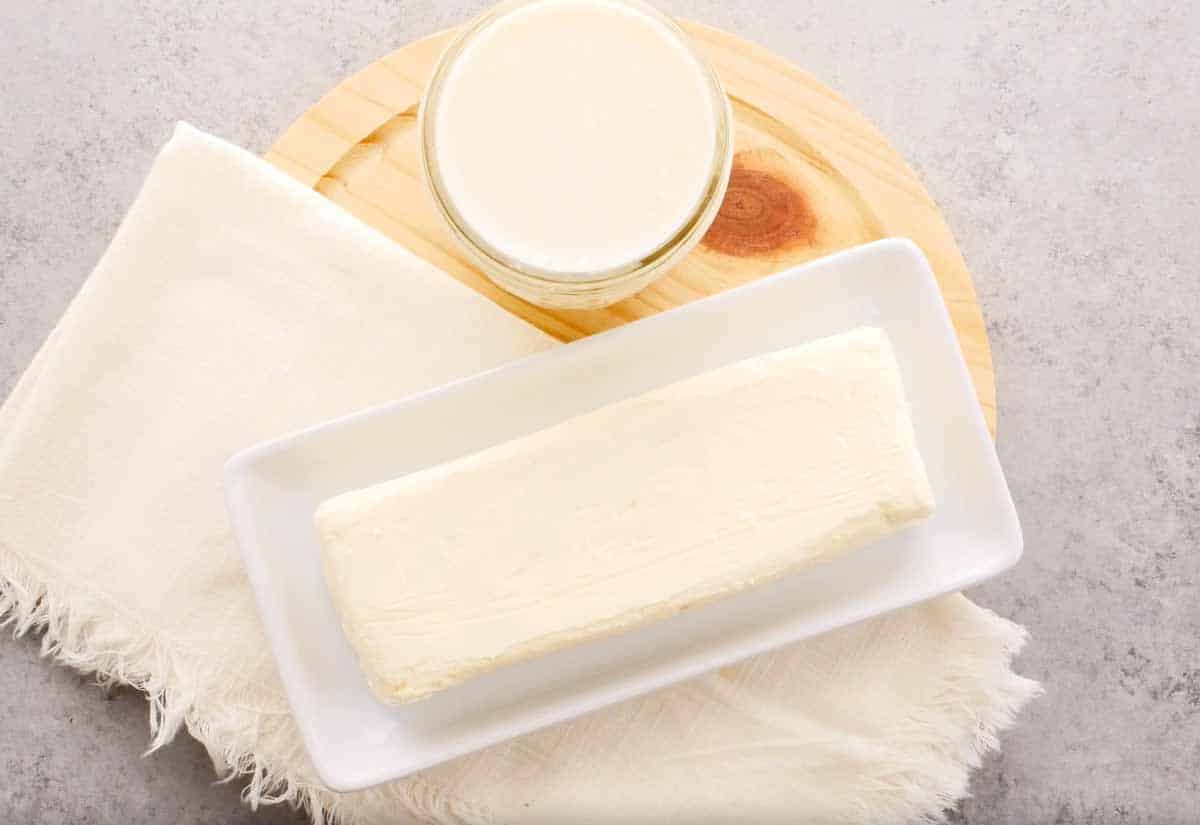
This is a two-for-one deal. You can make homemade butter and you will get buttermilk as a byproduct. All starting with heavy cream.
Homemade butter takes just 15 minutes.
Making your own butter is easier than you might think. You'll need a food process and some cheesecloth. The whole process takes about 15 minutes.
Homemade Butter is Freezer Friendly
Butter is freezer-friendly so you can make a big batch and store it in small portions. Thaw as you use it.
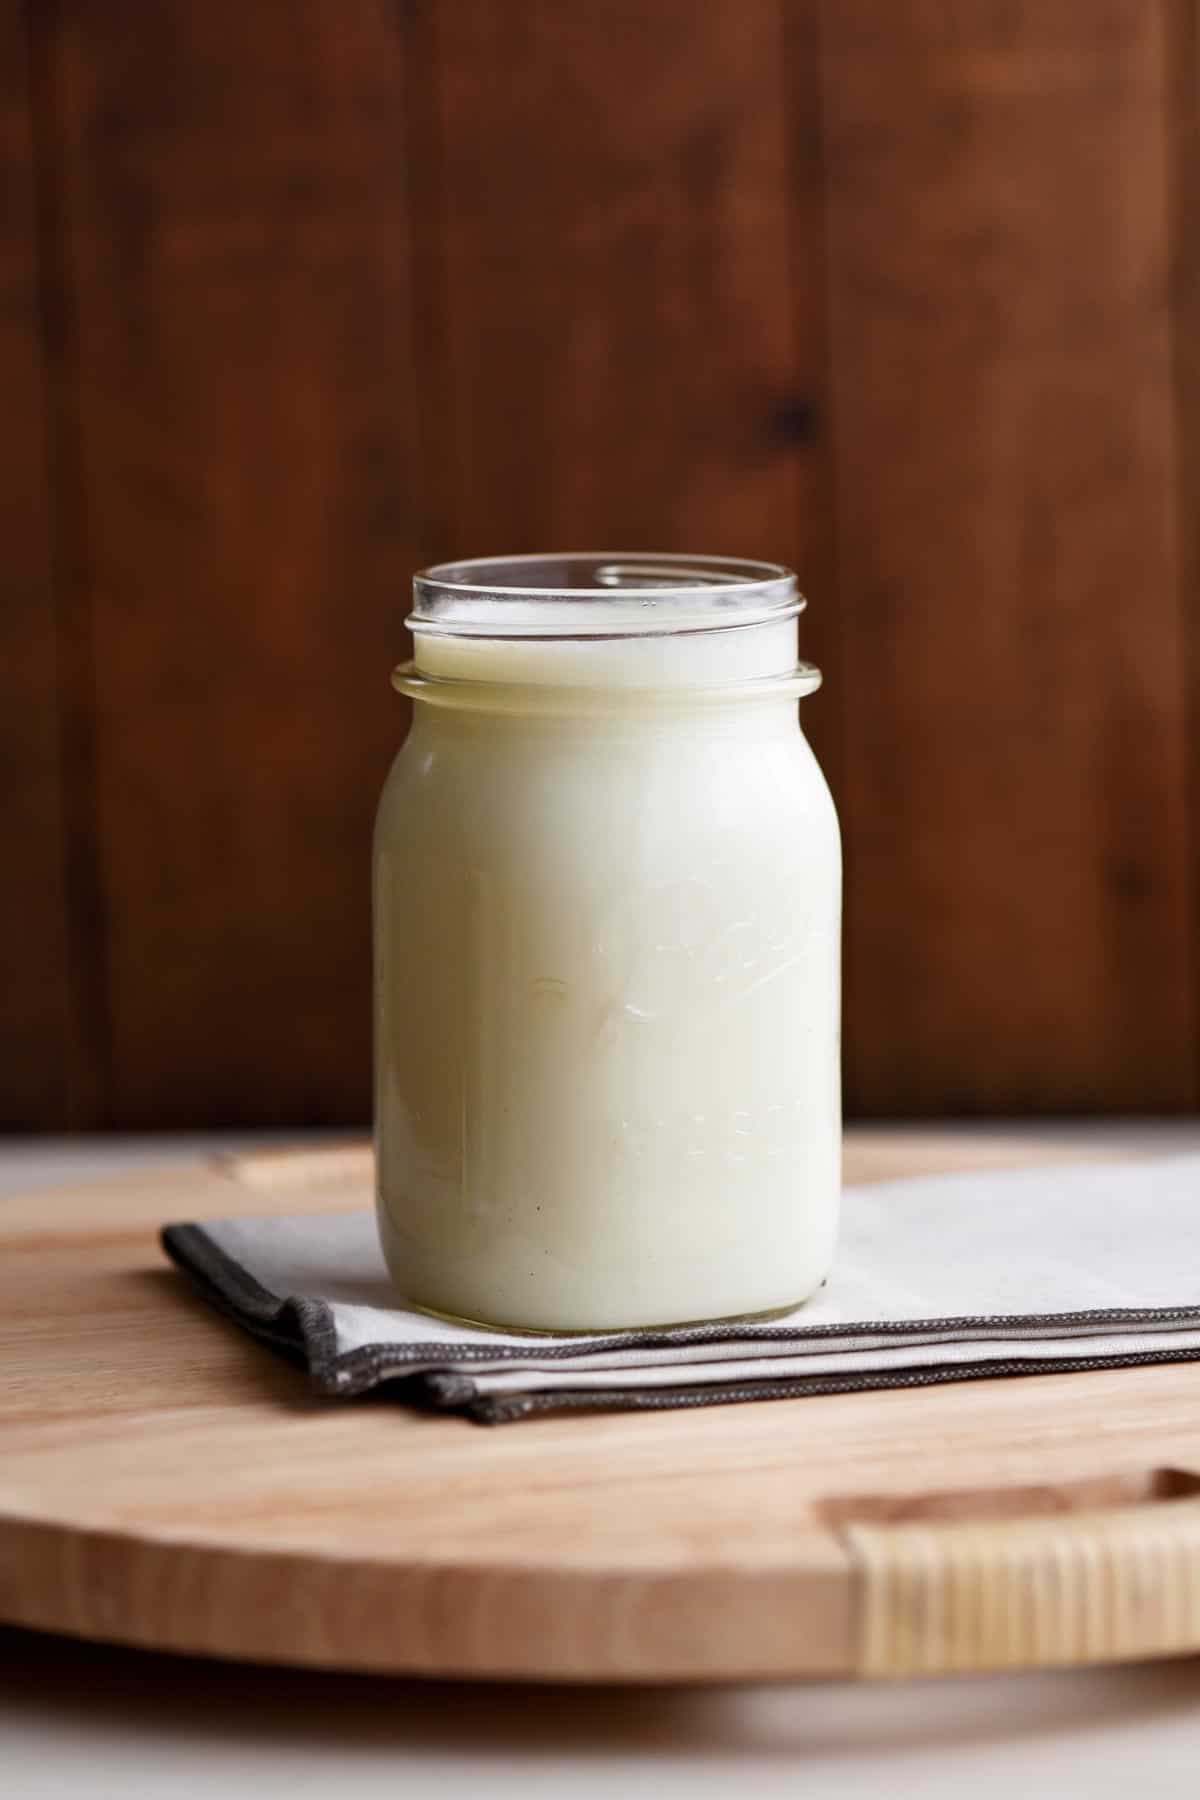
Buttermilk is the byproduct of making butter.
The process of making butter naturally produces buttermilk. So don't just toss it. You can save the buttermilk to make delicious pancake or use it to tenderize chicken.
You will need to culture your buttermilk to get that tangy buttermilk flavor. Culturing buttermilk is as simple as adding culture starter and waiting for the cultures to activate.
You can also use the buttermilk byproduct as-is, without culturing it. It will taste more like watery milk but can still be used in recipes or just as you would use milk.
★ Ingredients You'll Need ★
To make homemade butter, all you need is heavy whipping cream and salt.
The byproduct of making butter is buttermilk. If you want to culture your buttermilk, you'll need to buy buttermilk culture starter.
★ How to Make Butter ★
Here's a look at the steps.

- Add heavy cream to food processor.
- Blend until the fat separates from the liquid.
- Pour off the buttermilk and save it to be cultured. (more info below).
- Rinse the butter fat by adding cold water and blending again.
- Pour away the milky water. Repeat until water comes clean.
Note: This step removes excess liquid that can lead to your butter spoiling. Your goal is to be left with just the fat of the milk. The fat will not spoil even if left out at room temperature but if any milk is left in the fat, that can spoil and cause your butter to be rancid. - Mix in salt to taste. You can use table salt or sea salt. You can also blend in herbs if you want flavored butter.
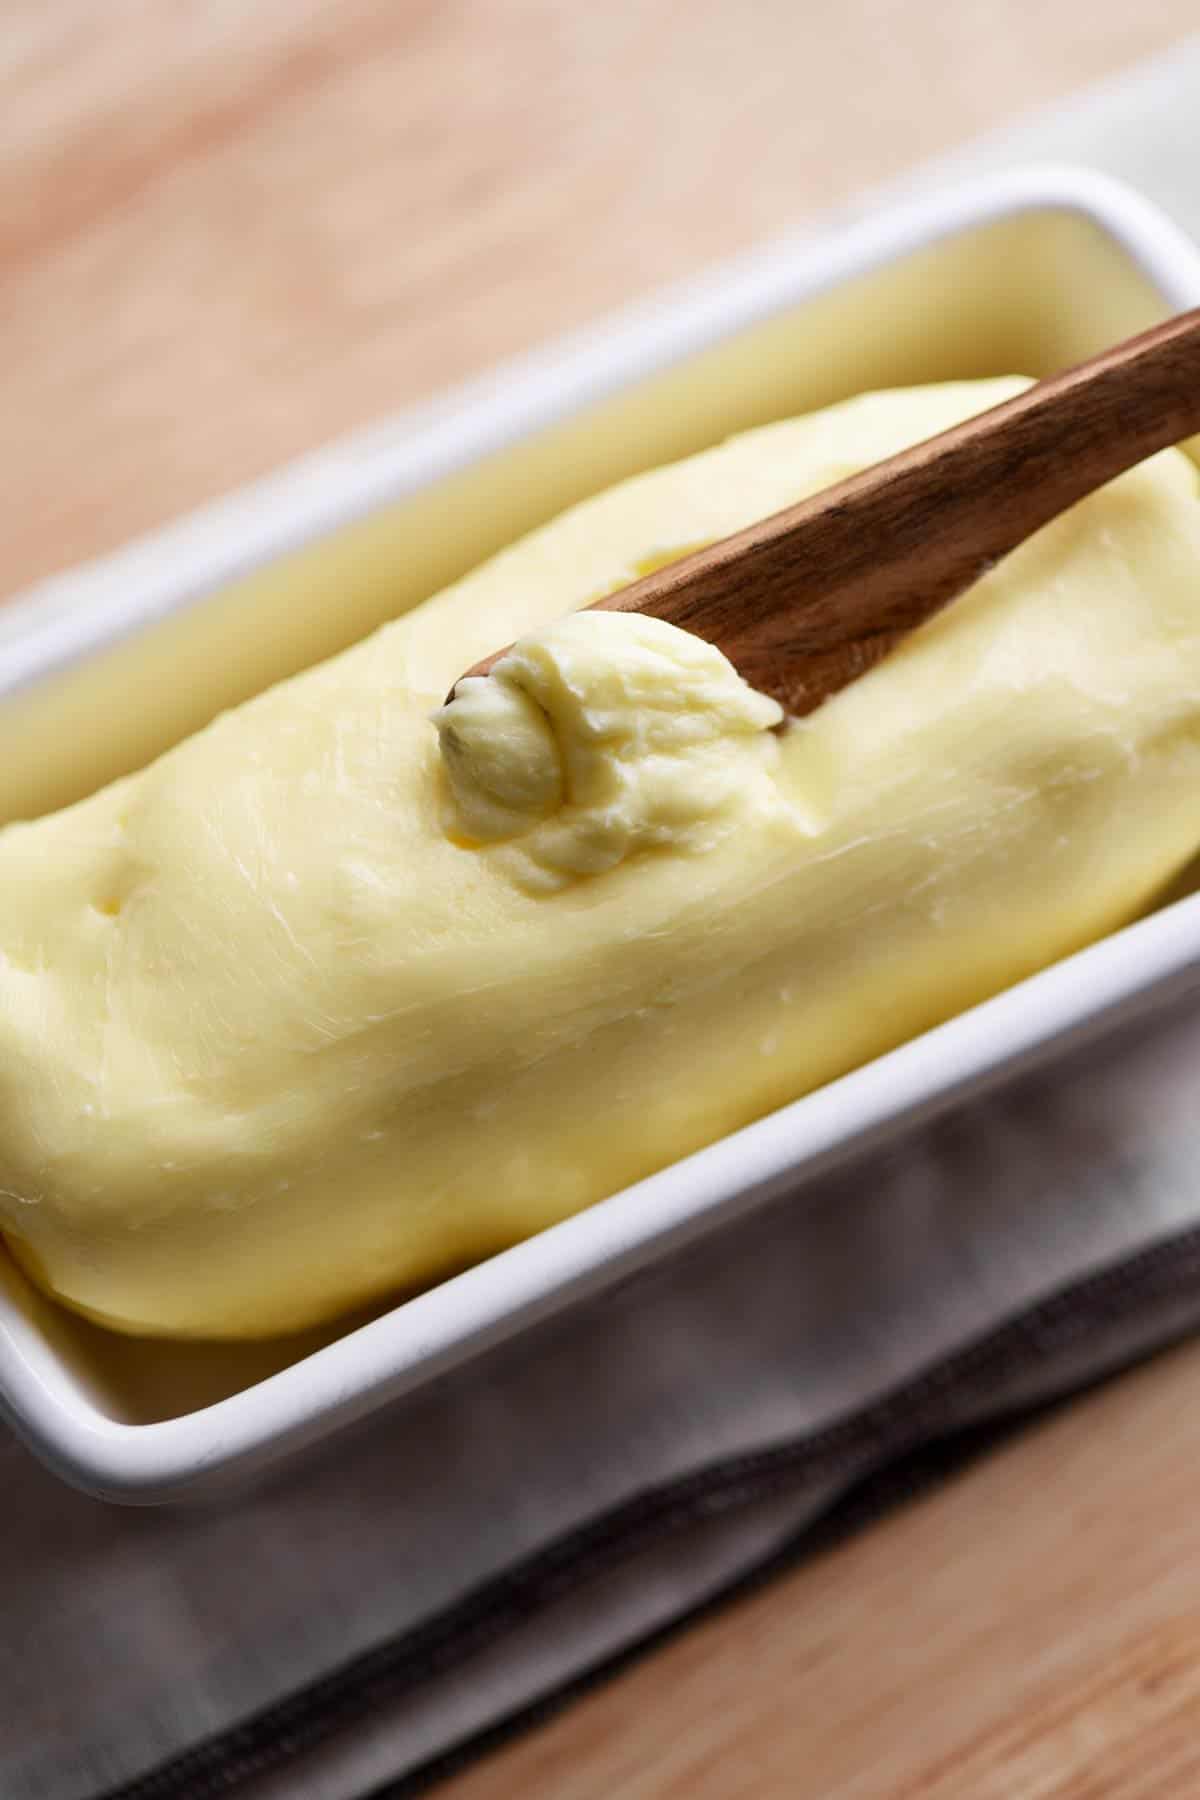
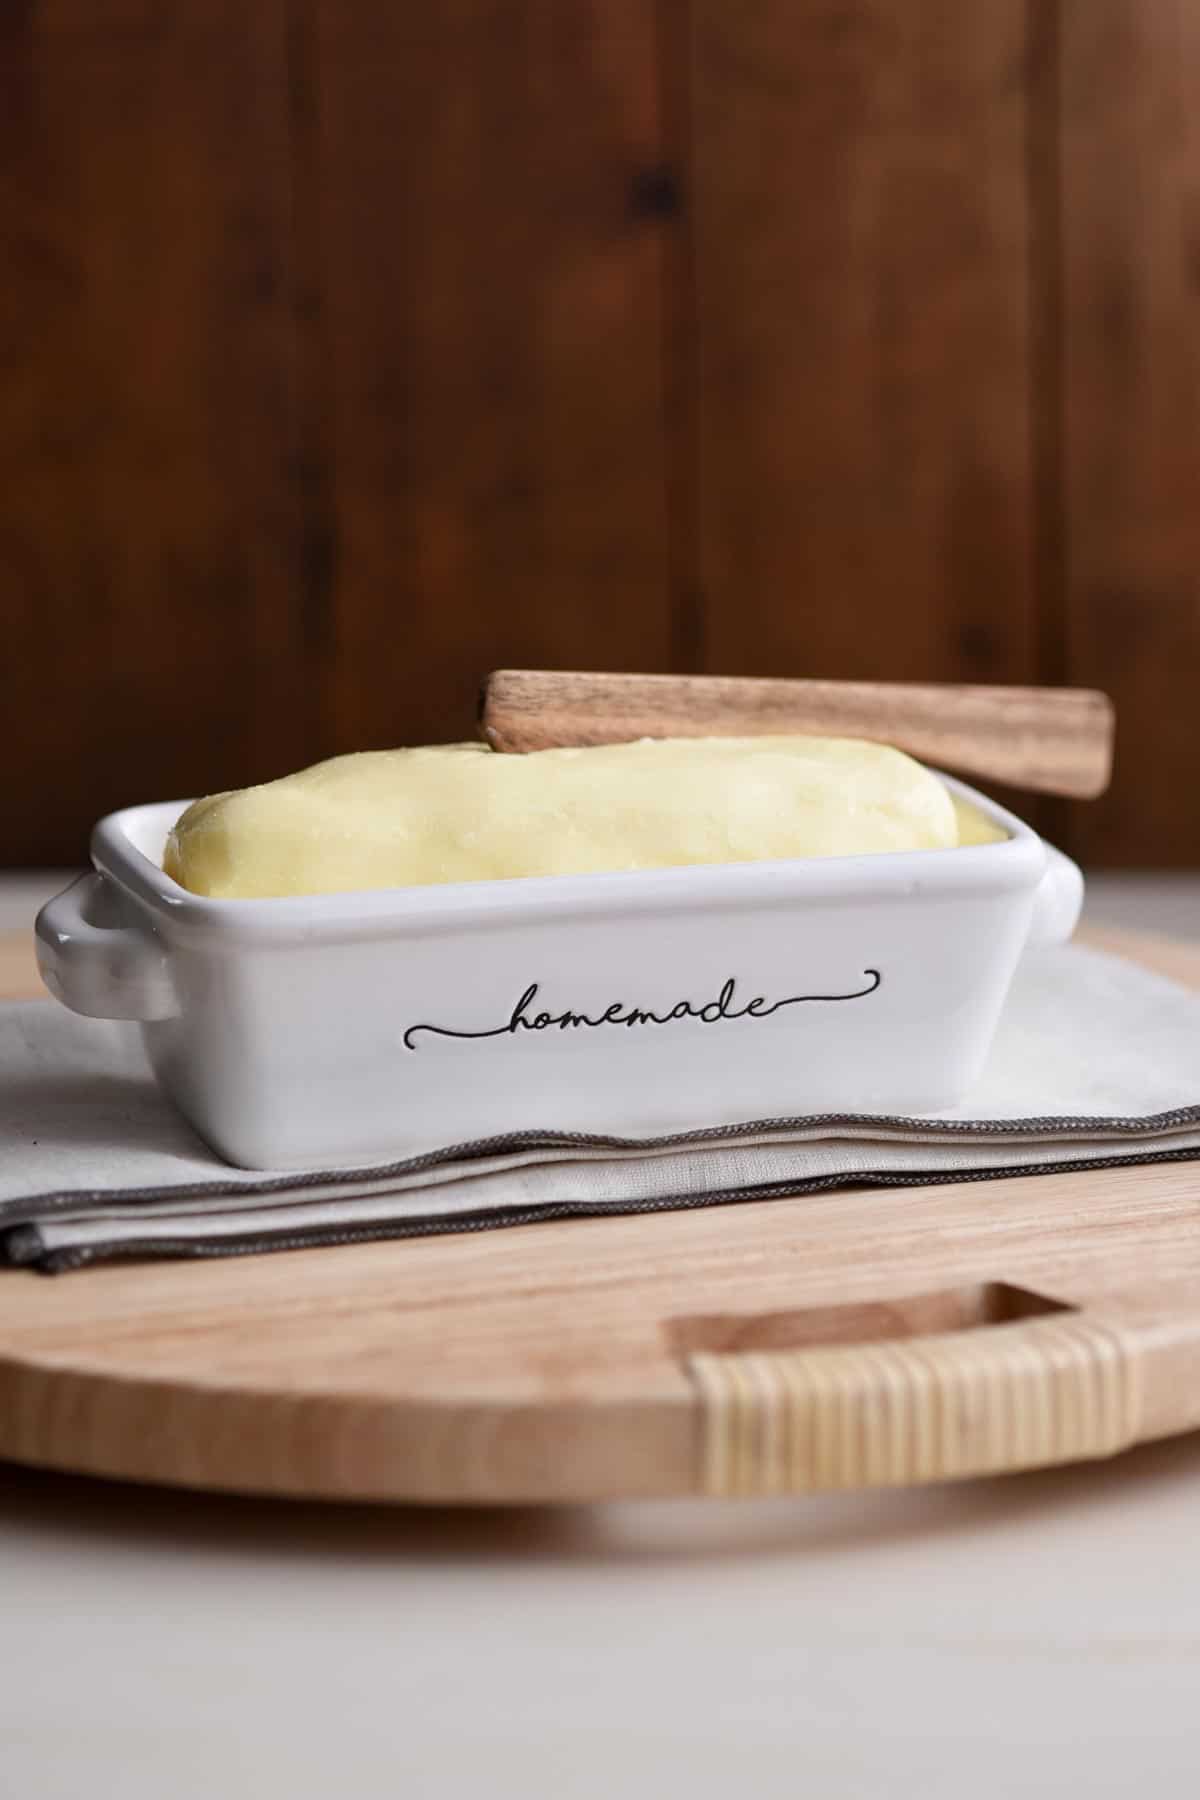
- Gather butter and wrap in cheesecloth.
- Squeeze to remove liquid.
- Shape your butter into a stick and chill to set if desired.
★ How to Culture Buttermilk ★
Buttermilk is the byproduct of making butter. However, if you're using pasturized heavy cream to start, then your buttermilk will not be cultured.
Everything sold in stores is going to be pasturized for safety reasons. This process kills harmful bacteria but it also kills the cultures that can be good for adding flavor and probiotics. The good news is, it's easy to add that good bacteria back into your buttermilk.
How to Re-culture Buttermilk
Culturing Buttermilk Using Culture Starter
To add cultures, you can purchase culture starters or add plain Kefir to your buttermilk which contains live cultures.
Culturing Buttermilk Using Kefir
If using Kefir, add 1 tablespoon to your buttermilk. Cover loosely to keep out dust but to allow airflow and place in a warm spot (70°-77°F is ideal) for 12-24 hours. Once the buttermilk becomes thick, use it or refrigerate for up to 2 weeks.
Note: Using live cultures involves the risk of consuming bacteria. If your buttermilk has a foul smell, it's likely gone bad and is not safe to consume. Use at your own risk.
★ Tips & FAQs ★
Yes. When you start with raw cream tp make butter, then your byproduct of buttermilk will already be cultured. No need to add cultures since raw milk already has those active live cultures known as probiotics. Note: since raw milk is not pasteurized, there can be harmful bacteria present in additional to the good bacteria — the probiotics. So drink raw milk at your own risk.
Depending on what state you live in, you may be able to find a small market or local dairy farm that sells raw milk if you're interested in getting the health benefits of raw milk and are not afraid of the risks. Read more about the risks of consuming raw milk here.
You can use a churn, a blender, a food process or a mixer. The taste will be the same. An old fashioned butter churn can be a fun activity to do with kids whereas modern tools offer speed and convenience.
Believe it or not, you can actually purchase butter churns on Amazon.
If you're trying to just get some homemade butter — stat — though, you might just want to go ahead and use a stand mixer or a food processor.
Yes. Cheesecloth is extremely helpful for making homemade butter. Homemade butter needs to be rinsed to remove liquids that can spoil and cause your butter to taste rancid. Cheesecloth acts as a strainer, containing the milk fat while rinsing away liquid with cold water. You can buy cheesecloth at some groceries stores or online. Shop cheesecloth on Amazon.
Homemade butter does not need to be refrigerated as long as the milk is completely removed from the butterfat. However, I recommend keeping your butter refrigerated just in case some of the milk remains even after you thoroughly rinse your butter. The milk can spoil and can make your butter taste rancid.
Yes. Cultured buttermilk can spoil if left at room temperature for too long.
During the culturing process it may need to be exposed to warmer temperatures. Refer to the instructions on the culture starter package for this.
However, once the culturing process has been completed, you will need to refridgerate to prevent buttermilk from spoiling.
Buttermilk should not have a foul smell. If it does, it's likely spoiled and should be thrown away.
Basically, bad things. You will want to take a little extra time to make sure you squeeze all the buttermilk out and thoroughly rinse your butterfat with cold water. This mean repeating the rinse and squeeze process as many times as needed for the water to run clear.
Why? Well, first, you don't want your butter to be milky because this will make things like your toast soggy instead of nice and crispy.
Second, any leftover buttermilk will start to go bad quickly, giving your butter a rancid taste. You butter can potentially become contaminated with bacteria as well.
Yes. But it will not be cultured butter.
When heavy cream is shaken, stirred or churned, the fat separates from the milk. The reason this separation occurs is because the membranes surrounding the fat in milk are very fragile and they rupture when agitated (source). Once the membranes rupture, the fat can attach to other fat and eventually begins to form clumps, leaving behind the milk. This allow you to separate the milk fat, add salt to it and call it butter!
To make cultured homemade butter from pasteurized heavy cream, you'll need add cultures to the heavy cream, before you begin the butter-making process.
To do this, you can add culture starter or plain Kefir to your heavy cream. Follow directions on the package for the culture starter.
If using Kefir, add 1 tablespoon to your pasteurized heavy cream, cover with a towel or loosely with plastic wrap or a lid (so that it's not airtight), and let the cream sit overnight at room temperature or until cream becomes thick.
Note: If you notice a foul smell, toss the heavy cream. It's likely spoiled.
For food safety, commercial milk goes through a pasteurization process to kill harmful bacteria. However, the pasteurization process also kills active cultures that contain helpful bacteria. You've probably heard them called pro-biotics. There are a number of drinks now you can buy that have been re-cultured after pasteurization in order to re-gain those pro-biotics.
This is a popular hack if you don't want to deal with culturing. The flavor is produces is similar to buttermilk, but it's not true buttermilk. True buttermilk goes through a chemical process and produces a different taste and a thicker texture. You also get those healthy pro-biotics when you culture the milk using actual cultures. If you're really after the authentic flavor and smooth, creamy texture of buttermilk, then culturing the milk leftover from making butter, is the way to go.
When you culture milk, the fermentation process actually transforms lactose (the sugars found in the milk), into lactic acid. Lactic acid is much easier to digest than lactose, which is appealing if you are lactose intolerant.
Bet you didn't know this was going to be so complicated.
Luckily making butter and buttermilk is not complicated, but understanding how the culturing all works, is pretty complex!
★ More Homemade Condiment Recipes ★

Recipe Ideas Using Homemade Butter
Since homemade butter doesn't always last as long as store bought, you'll want to use it up quick or freeze it in batches. Try making my chocolate buttercream frosting with homemade butter and see what you think!
Try making these soft and chewy chocolate chip cookies. Or my popular ham and cheese sliders with butter topping.
Homemade butter is of course great on toast and for everyday cooking. Browse all my recipes to get more ideas.
Recipe Ideas Using Buttermilk
As far as the buttermilk, well you could make buttermilk pancakes. But that's kinda boring don't you think? Why not try using your buttermilk to make something a little different! Try my creamed roast beef with Yorkshire pudding, loaded potato soup or Raising Cane's copycat Buttermilk-marinated chicken fingers.
This recipe for butter and buttermilk was featured on South Your Mouth!
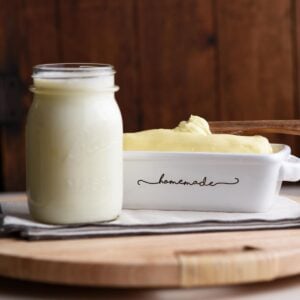
Homemade Butter and Buttermilk from Heavy Cream
Equipment
Ingredients
Butter
- 4 cups heavy cream 32oz
- salt to taste
Buttermilk
- culture starters or use non-flavored Kefir
Mighty Mrs. is a #WalmartPartner.
Instructions
- Blend heavy cream. Pour entire carton of heavy cream into a food processor, blender, or butter churn. Blend for about 10 minutes or until the fat separately completely from the liquid milk. You should see two distinctly different substances and then you know you're ready for the next step.
- Drain away buttermilk. Next, drain the milk into a mason jar. This is your buttermilk!
- Rinse butter. Once you've drained all the milk, rinse the fat to flush any extra hidden milk from it. To rinse, add a cup of very cold water and blend. Pour off the watery milk. Go ahead and pour it down the drain, this stuff isn't worth saving.Repeat until water runs clear.
- Squeeze out remaining liquid. Take the chunk of butter and wrap it in cheese cloth. Knead butter to get out any remaining liquid. Rinse under cold water while kneading.
- Season with salt. Stir or knead in salt to taste.
- Shape. Use clean hands to shape butter into sticks or whatever shape you prefer.
Video
Notes
- Butter can be refrigerated for up to 5 days or as long as it does not have a sour odor.
- Butter can be frozen for up to up to 1 year.
- Shape butter when its room temperature using your hands or a butter mold.


Cinthya Knox says
Hi, can I used capsuled probiotics with the prebiotics? They are the probiotic capsules I drink daily. They are in powder form. Instead of Kefir or starter?
Angela G. says
I'm not sure, Cinthya. You may be able to if they contain "live active cultures". You need those living culture to activate the process.
Wendy Edwards says
FYI- I just did experiment doing exactly that using lactobacillus blend capsules- I used t to 2 cups and let sit room temp for 24 hours. Worked like a dream lol. So happy. Have fun!