Skim by Section
★ Why You'll Love this Recipe ★
This milk and honey bread comes together so quick and easy, it's the perfect treat for weekends. And it will make your house smell so good too!
All you need is just 5 ingredients, 2 minutes of kneading, and an hour of rising.
Easy and delicious to make!
Homemade bread seems like one of those illusive things. But it's not. Just read on for a few tips and tricks and you'll nail it on the first try.
This recipe is absolutely easy enough for first-time bread makers! No bread machine required.
Easy enough even if you've never made bread before.
Salty-sweet Flavor
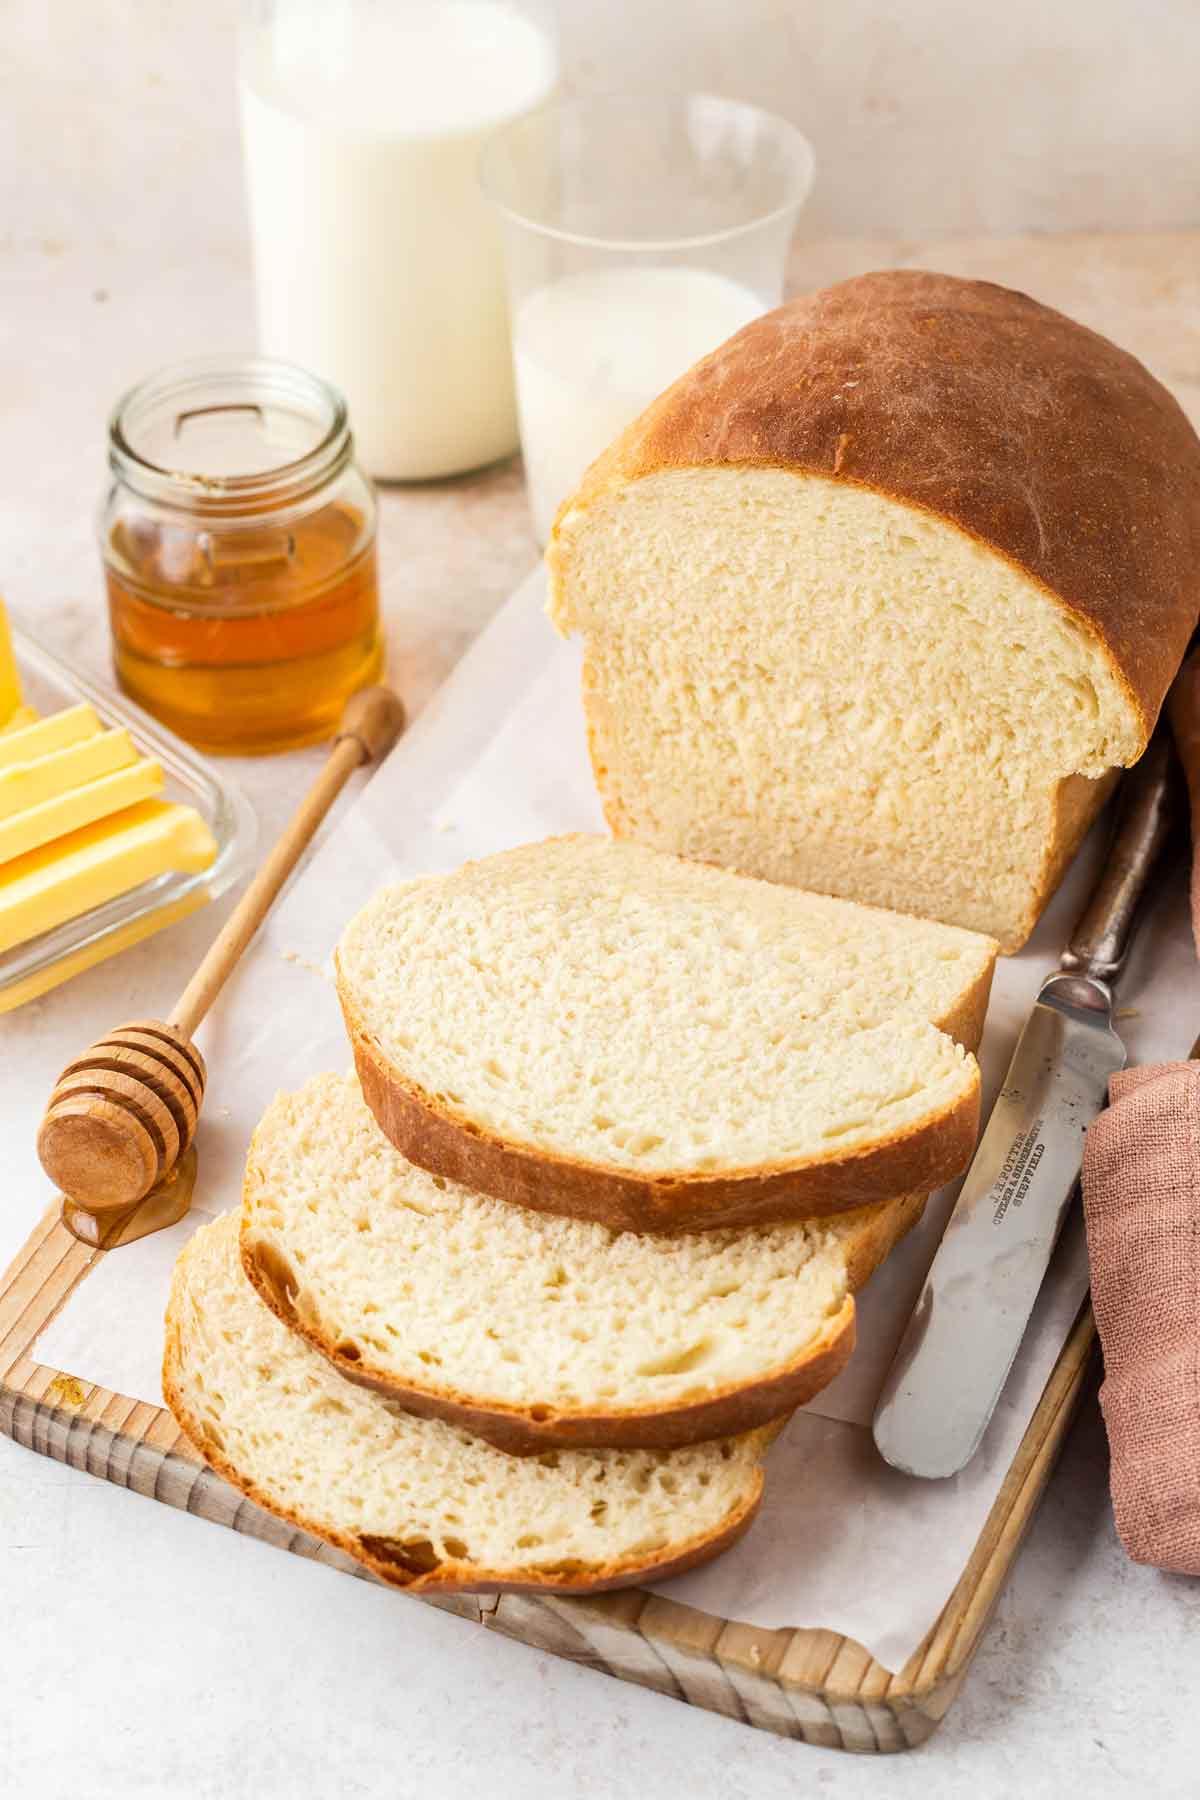
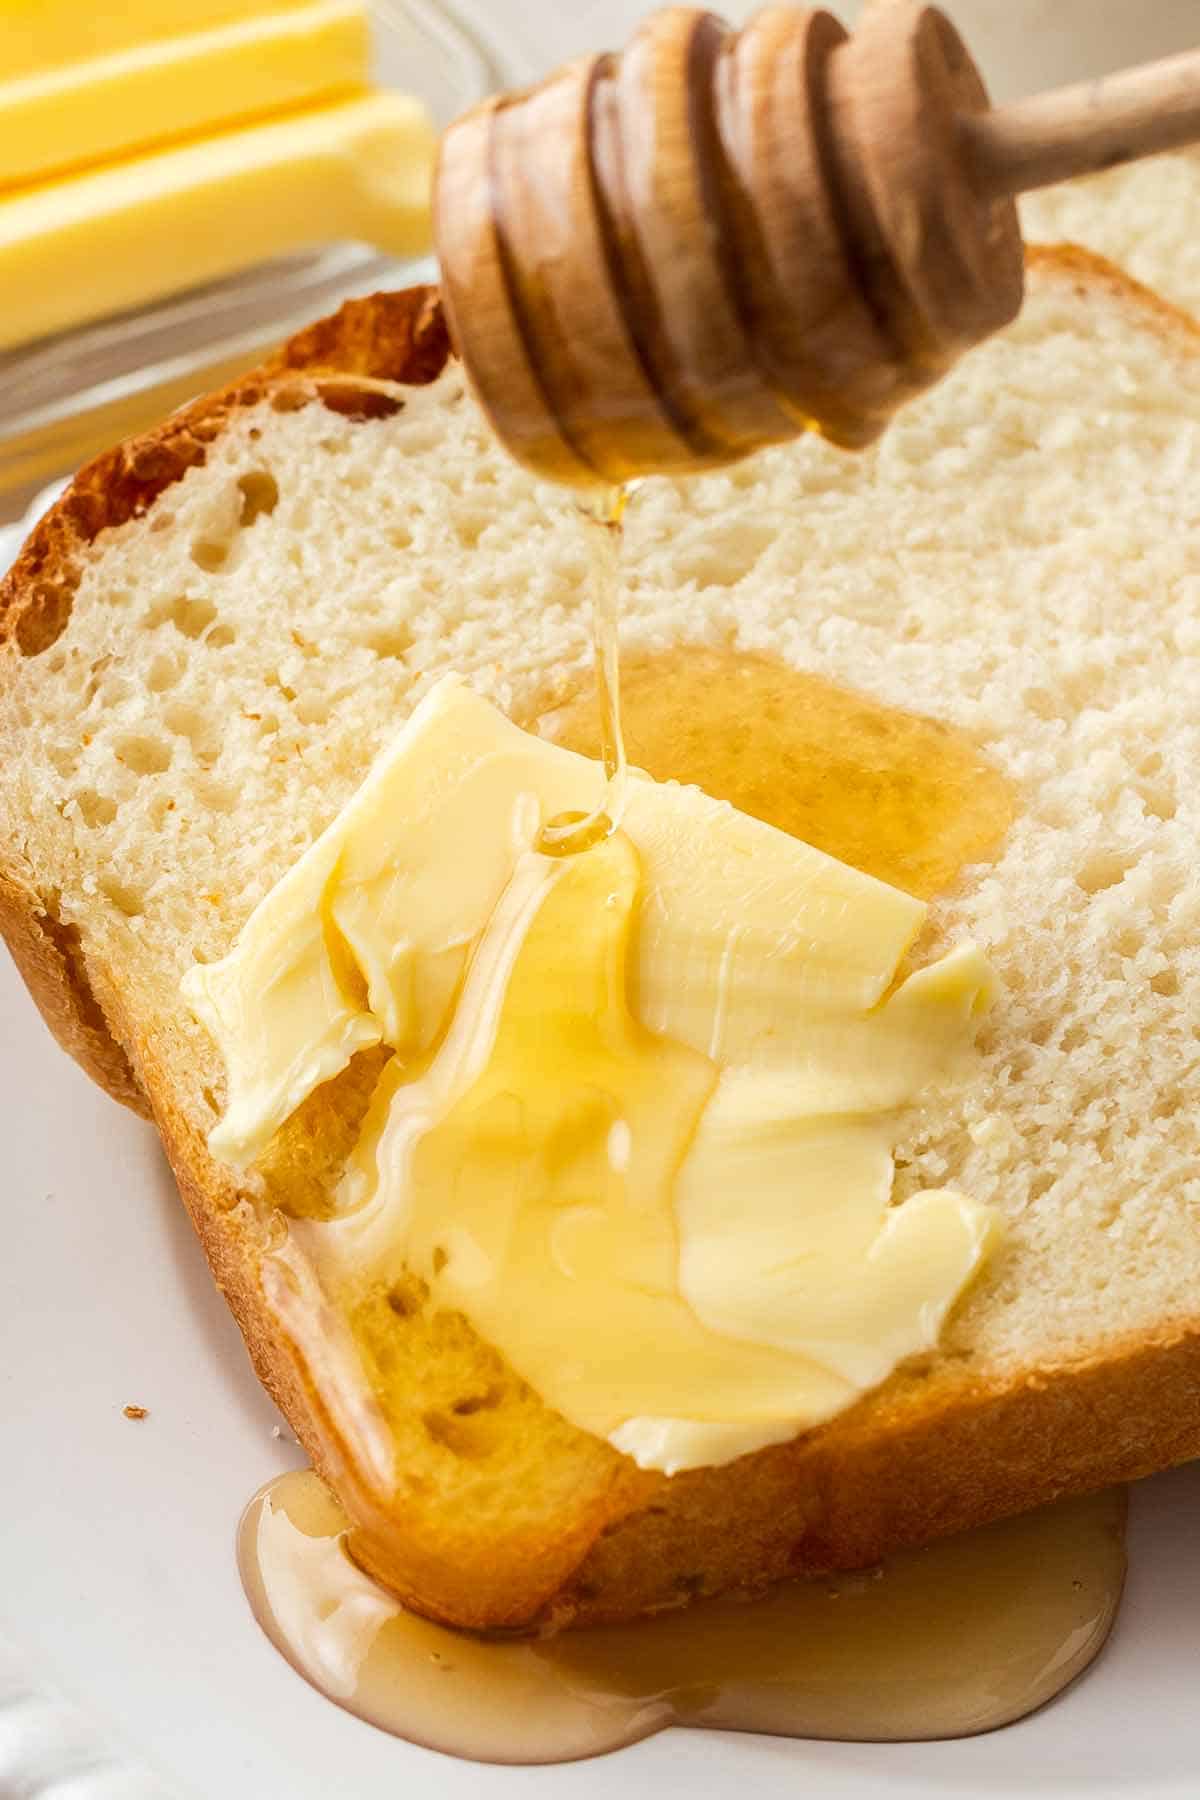
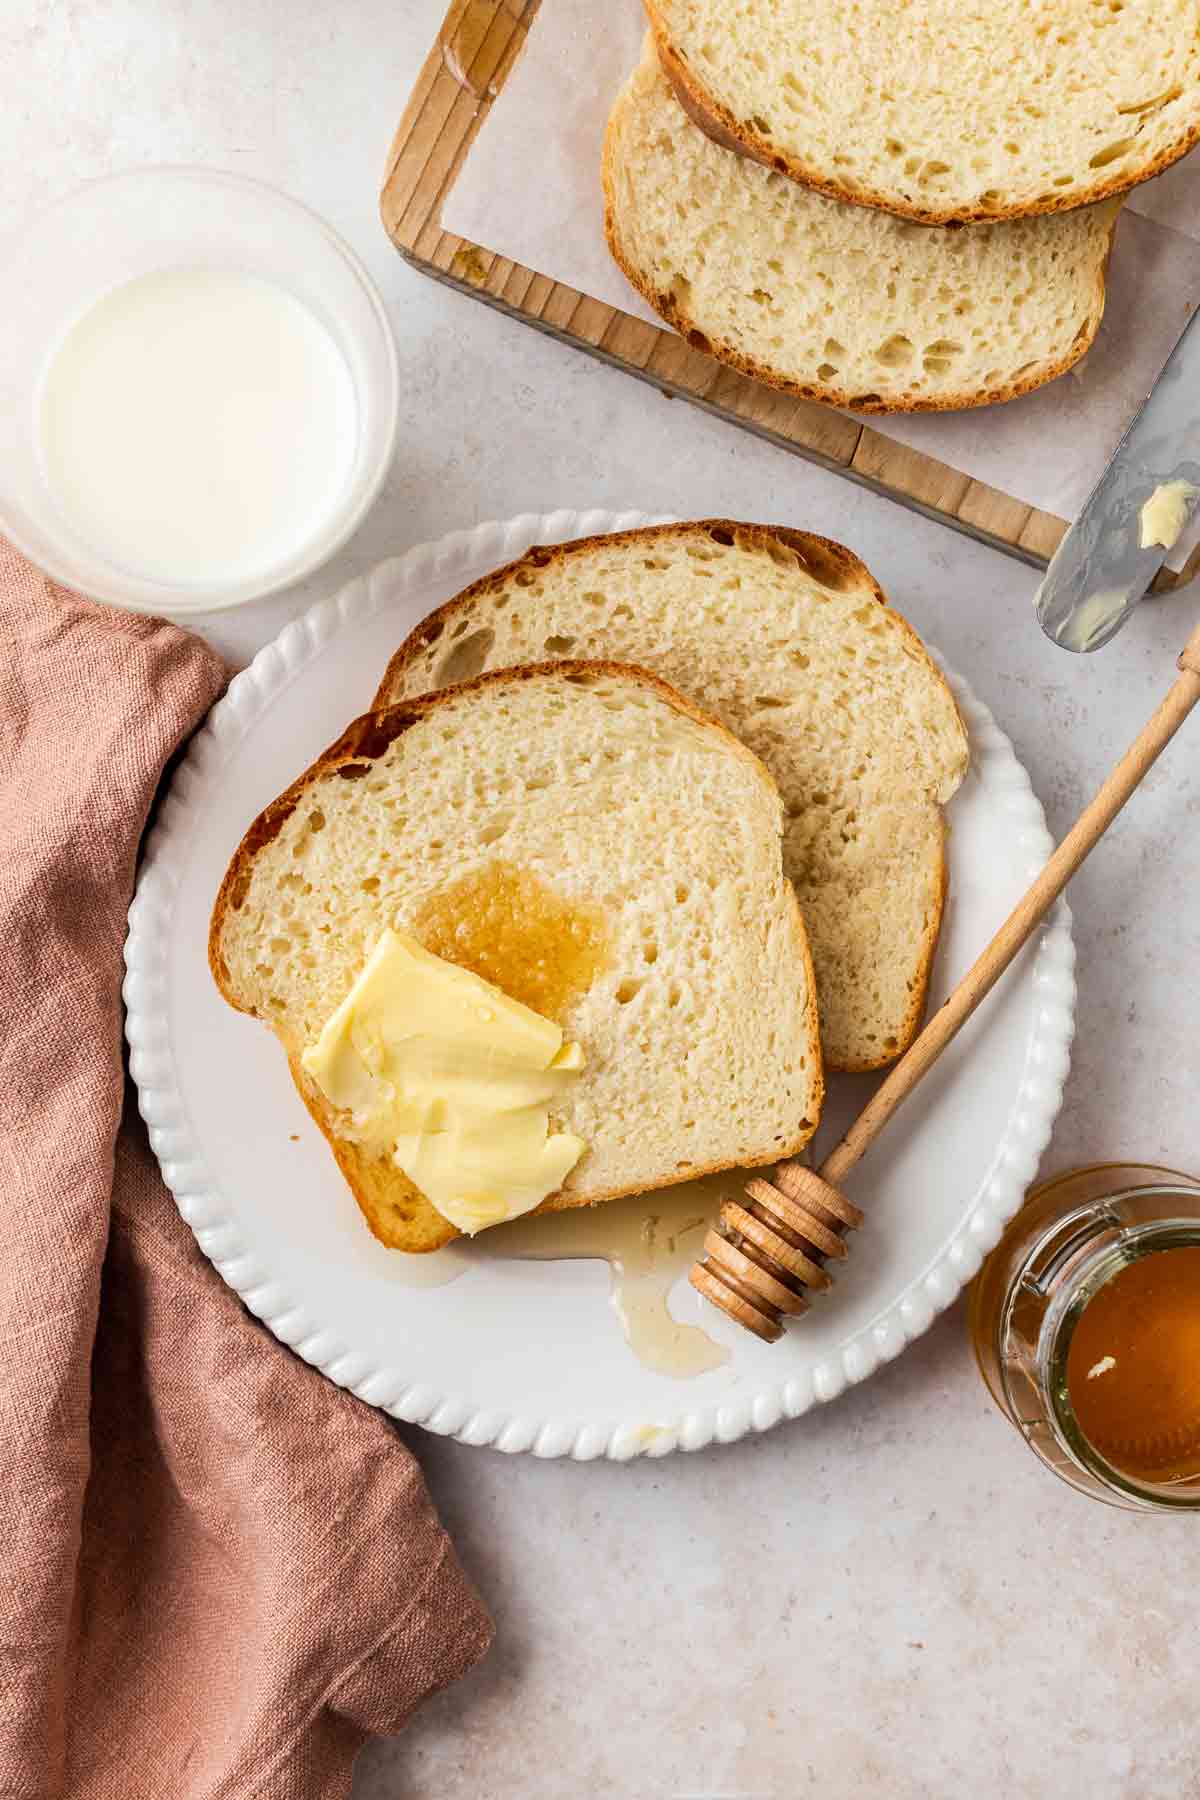
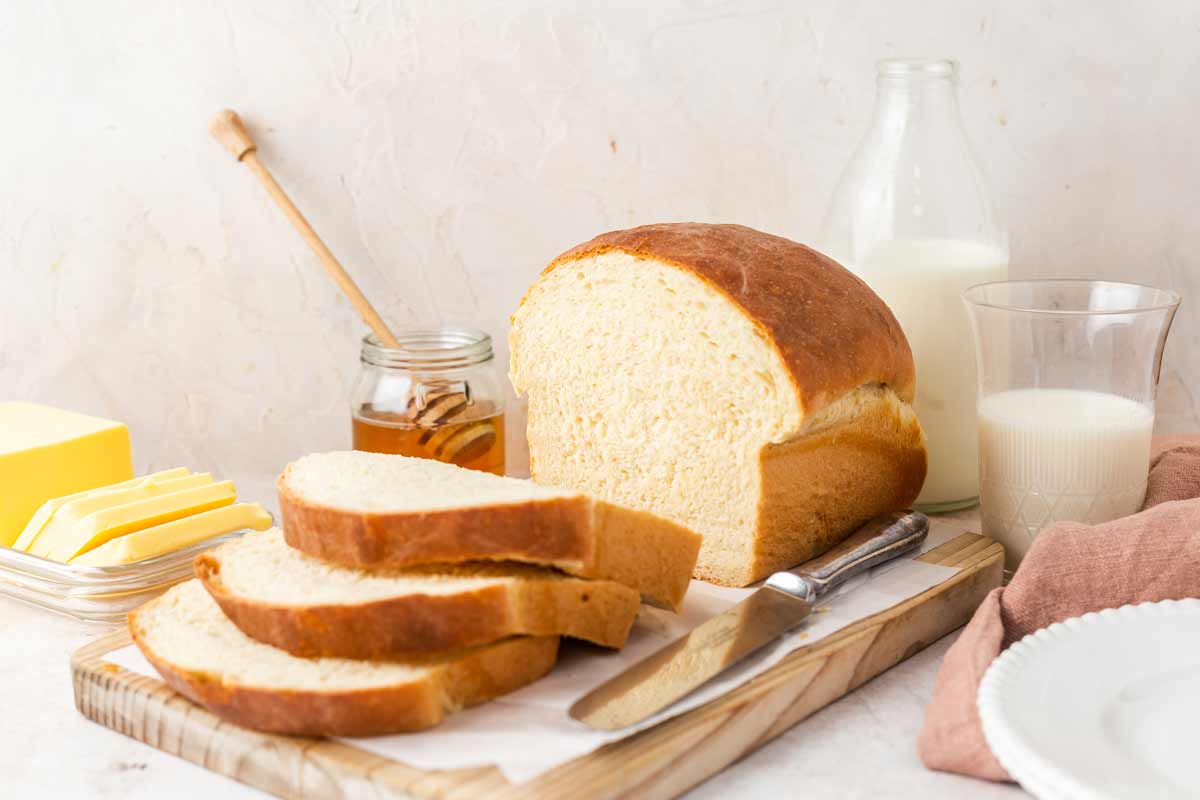
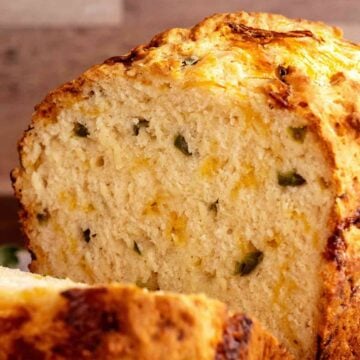
The unique flavor of this loaf of bread is going to really wow you. It's very subtly sweet. I love a slice toasted and smeared with butter. You can also use two slices to make amazing breakfast sandwiches or use it to make a sandwich to enjoy for lunch.
Pairs well with...
Try this Milk and Honey Bread spread with my simple homemade butter! This bread goes great with my Old-Fashioned Vegetable Beef Soup and my Creamy Tomato Basil Soup.
★ Ingredients You'll Need ★
All you need is 5 ingredients to make this bread.
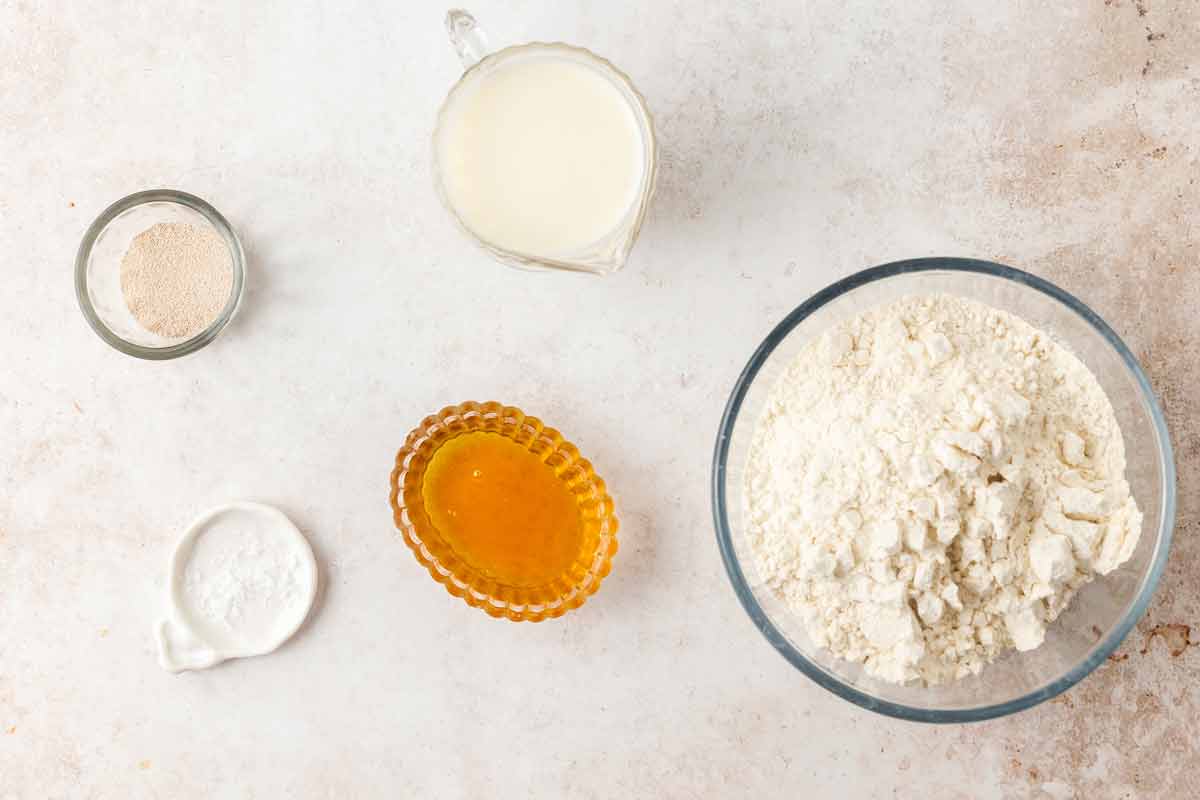
Here's everything you need:
- Active dry yeast. Be sure it's fresh and not expired.
- Milk. You can use any percentage milk, however, a high percentage or whole milk will give you a more rich flavor. Go lighter if you prefer to cut calories and don't mind sacrificing a little flavor.
- Honey. Any kind of honey works. To loosen hardened honey, place jar in a bowl or deep dish of very hot water.
- Salt. Table salt, or if using sea salt, cut the amount in half.
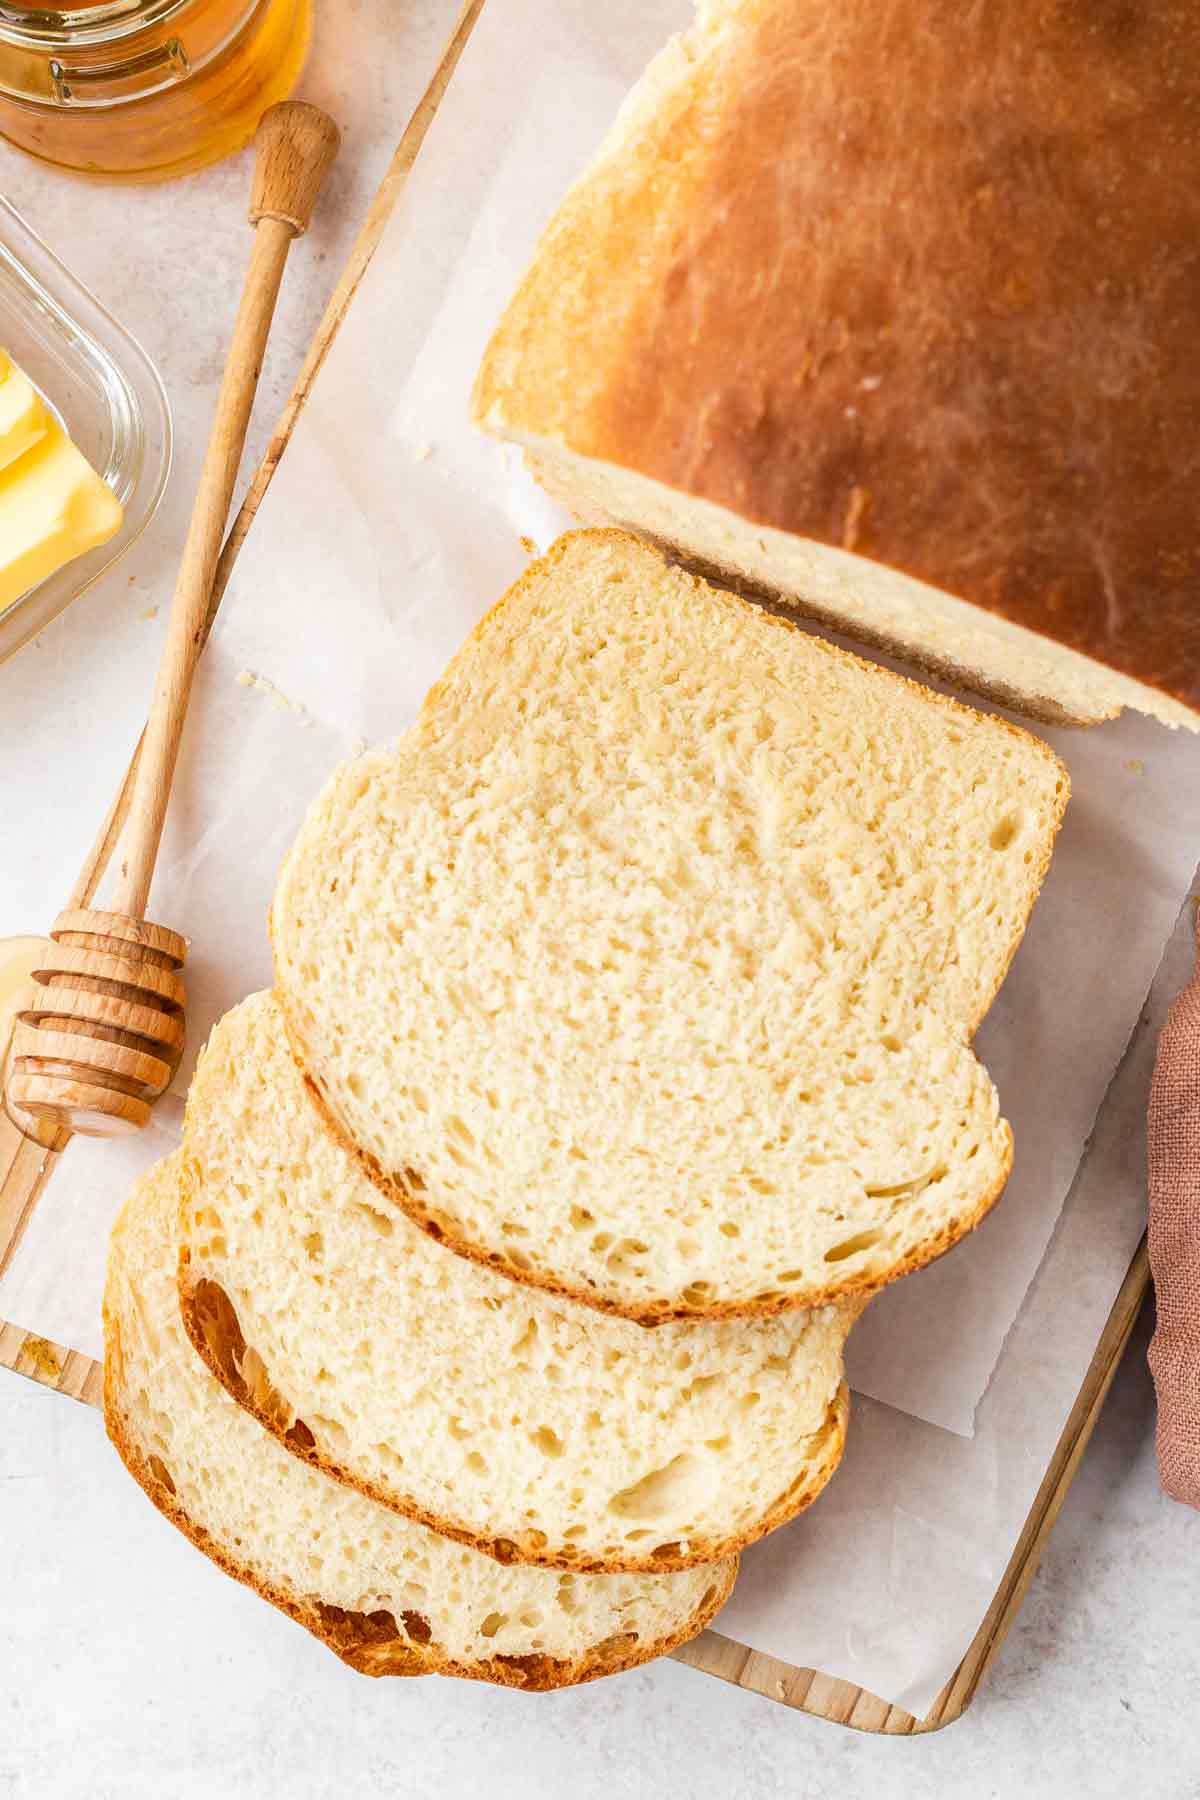
- Bread flour. You can use all purpose flour, however, bread flour is much more ideal if you want soft, flexible bread. All purpose flour will create a stiff loaf and stiff slices.
- Optional: Add herbs like fresh rosemary or thyme to enhance the flavor of your bread.
You'll also want to use butter, oil or baking spray to grease your pan.
Serve warm topping with butter. Want to go all out? Make your own butter!
★ How to Make this Recipe ★
Here's a quick snapshot of the steps to making this bread.
Check out more detailed instructions below, but here's an overview of everything you need to do:
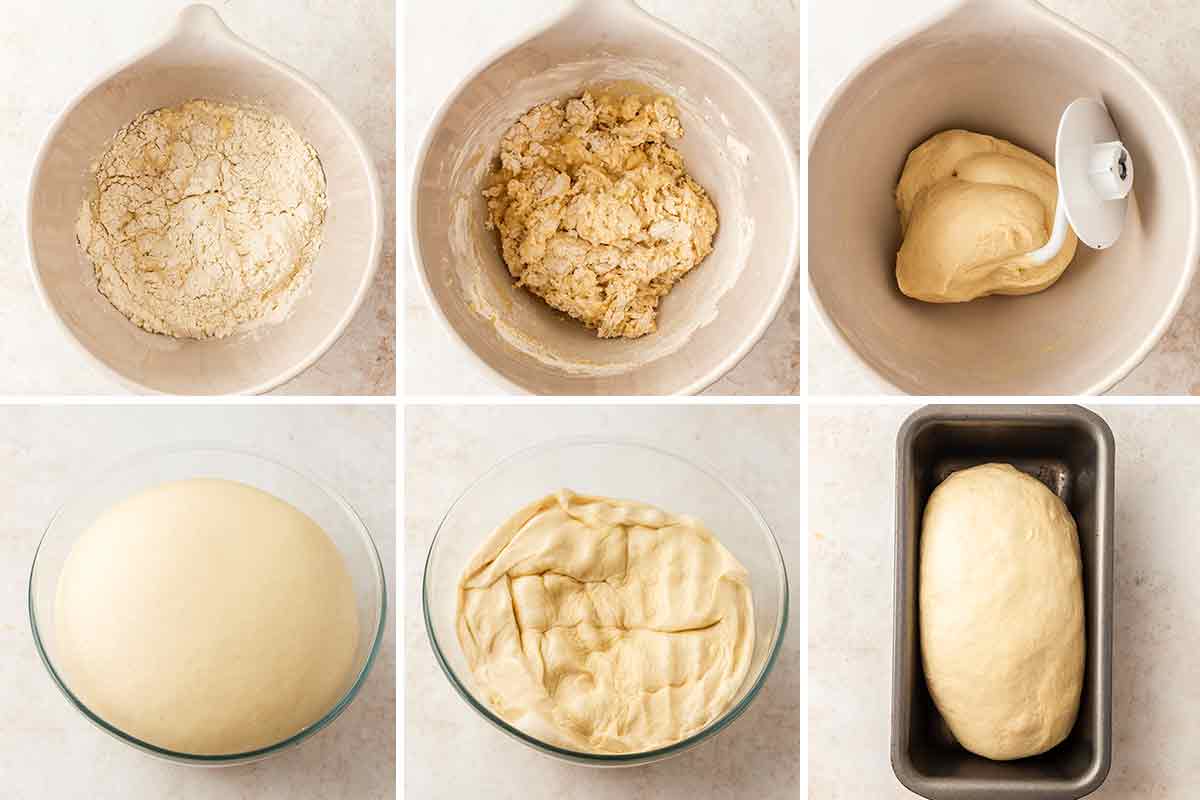
- Add yeast to warmed milk.
- Stir in honey, salt and flour.
- Knead dough.
- Cover dough and let rise.
- Punch down dough then move to bread pan.
- Bake then let cool, slice and serve.
That's all there is to it. Pretty easy for homemade bread!
★ Tips & FAQs ★
If you're nervous about making this bread, read on for several tips.
Bread flour offers a more chewy and soft bread-like texture.
However, you can use all purpose flour if that's all you have. The bread will be a bit more stiff and dense but will still taste great.
Don't be too worried about working with yeast! It's not difficult. The most important thing is getting a fresh, new pack of yeast. The newer your yeast is, the better it will work. Certainly, make sure your yeast is not expired. Old yeast will potentially not activate, leaving you with a very dense and stiff loaf of bread.
The next most important thing is using very warm liquid to dissolve and activate it. The ideal temperature of your liquid should be between 105˚-110˚F. The best way to test this is with a thermometer. If you don't have a kitchen thermometer though, or don't have one that goes that low, you can get one from Amazon, they're pretty inexpensive. Shop cooking thermometers here
If you don't have time to get one, no worries. You can estimate it. Given your body temperature is 98.7, and the liquid needs to be just warmer than that, it's pretty easy to feel for it. Take a drop of the warmed liquid you're using, in the case of this recipe, it will be milk, and put it on the inside of your wrist. If you can't feel it, or it feels cold, then you need to make it warmer. If it feels hot, it's too hot. If it feels a little warm, then it's probably just right. (Note: Use extreme caution when applying any hot liquid to your skin)
A hand or stand mixer with bread hooks saves time, but if you prefer or don't have this equipment, you can knead bread dough by hand. It will just take a bit longer. Generally, 2 minutes of electric kneading is equivalent to 10 minutes of hand kneading. To knead by hand take the ball of dough and press it flat into a circle with your hands. Fold the dough in half and press down. Then fold it in half again so it's a quarter of the size it was. Press down. Then repeat over and over.
Yes! Save time kneading, get some dough hooks. They make them for stand and handheld mixers. I do not have a stand mixer but I do own a very powerful Kitchen-Aid hand mixer. If you plan to use a mixer to knead your dough, then you'll need a sturdy mixer with an adequate motor to knead bread.
After burning out a few mixers, I found the Kitchen Aid hand mixer to be an excellent choice. It's only slightly more expensive than other mixers and has much more power. Trust me, it's worth it!
I personally prefer a hand mixer to a stand mixer for a few reasons:
1.) It takes up less space. Counter space is valuable and my hand mixer doesn't take up any of it. It fits snugly in a cabinet, along with its attachments.
2.) I like that I have more control over things with a hand mixer. I don't mind my arms getting a little work out (who doesn't need that?) and I like being able to use the mixer with any bowl I want.
3.) I love all the colors the Kitchen Aid mixer comes in! We own an orange ones because we're Cleveland Brown's fans but I was so tempted to get so many of the other colors. They're all pretty! It seems like a minor detail but I get a little joy out of having colorful and fun cooking tools.
I recommend buying the mixer plus all of the attachments which includes two dough hooks. Shop Kitchen Aid hand mixer with attachments on Amazon
You can choose your favorite color. 🙂
If you already own the KitchenAid hand mixer, you can just get dough hook attachments: Shop dough hooks on Amazon
Bread dough will need to rise at least once, for about an hour in a warm place. A microwave with the lights underneath on work well. The lights make the microwave nice and warm but not too hot.
You can also put your dough in the oven. Just make sure the oven is off. If it's cold in there, turn it on for a few minutes to warm it up, then turn it off and put your dough in there. If you have a sunny room, that would probably work too. Just a little warmer than room temperature is what you're after.
Specifically, the ideal temperature for letting your bread rise is 80° - 90°F. Higher than 90˚ and the yeast can die, preventing the dough from rising. Lower than 80˚ and the yeast will activate more slowly or not at all which will increase the time it takes to rise or the dough may not rise at all.
Cover your dough with a breathable towel, like a thin tea towel or a kitchen hand towel that doesn't shed is fine too.
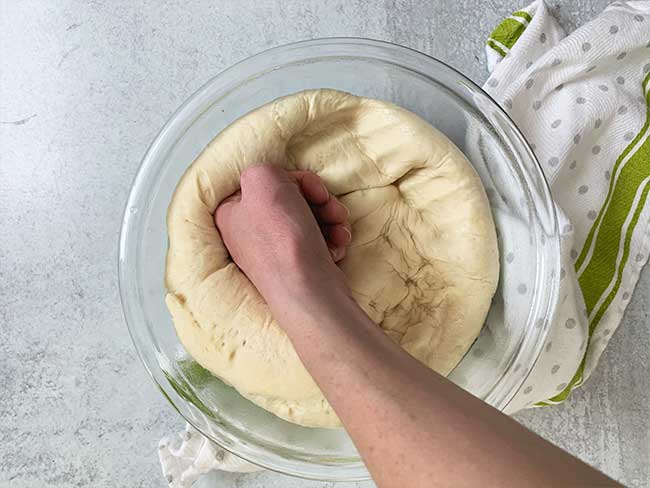
Once the dough is done rising, you'll be able to press into it with your finger and see an indentation. That's how you'll know it's done rising.
The next step before baking is to punch it down. You want to punch the dough straight up and down with the goal of pressing it evenly into the bowl. 4-5 punches should do the job.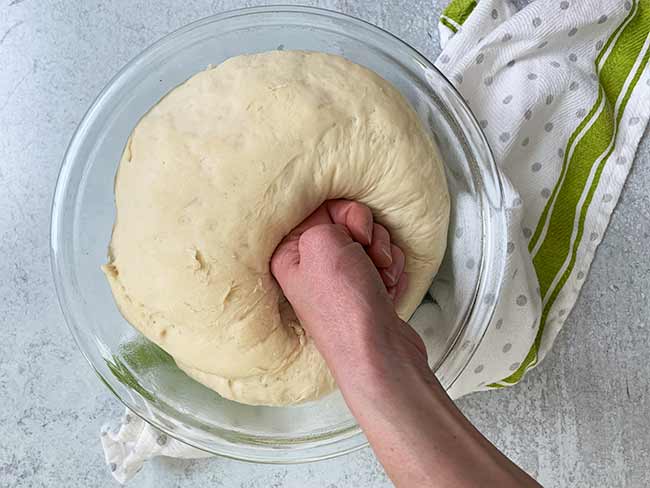
Carefully handle the dough when you place it into your greased bread pan. You'll want to flip your dough over so that the smooth part that was in the bottom of the bowl becomes the top of your loaf. Try not to press into the dough when you handle it of you will end up with a lumpy looking loaf.
Don't forget to grease your bowl and your bread pan! Your dough will be sticky so to easily get it out of the bowl, make sure you grease it first. Same with baking your bread in the pan. Once it bakes, it will be difficult to get out of the pan if you forget to grease it! You can use cooking oil or butter to grease both things and be generous with it, taking the oil all the way up the sides of the pan (and bowl). Too little oil will make it difficult to remove the loaf from the pan later.
Cover your dough loosely with plastic wrap sprayed with non-stick as it rises or a floured towel. Or put it in the microwave and you do not need an additional cover.
Use a bread knife to slice your bread. A bread knife is long and serrated so you can saw through a loaf of even the most tender bread without squishing it. This bread in particular is very light so I highly recommend slicing it with a long, serrated bread knife. Shop bread knives on Amazon
Homemade bread lasts about 3 to 4 days at room temperature or up to 7 days in the fridge, though refrigeration can dry it out. For longer storage, freeze it for up to 3 months, tightly wrapped.
Toast and spread with butter. Yum!
Want a real treat? Try topping your homemade bread with homemade butter! Get my homemade butter recipe here.
★ More Bread Recipes ★

Check out all my easy bread recipes
This recipe for easy 5-ingredient milk and honey bread was featured on South Your Mouth!

Easy Milk and Honey Bread (5 Ingredients)
Equipment
Ingredients
- 1 package active dry yeast
- 1 ¼ cups milk warmed
- ¼ cup honey
- ¼ teaspoon salt
- 3 ½ cups bread flour
- cooking oil for greasing
Mighty Mrs. is a #WalmartPartner.
Instructions
- Warm milk. In a large glass bowl, warm milk in the microwave for about 1 minute or until milk is very warm, but not hot to touch. (Between 105˚ and 110˚F is ideal for dissolving and activating yeast)
- Activate yeast. Add yeast to milk and whisk until dissolved.
- Add ingredients to form dough. Stir in honey, salt and flour.
- Knead dough. Using a hand or stand mixer with dough hook(s), knead the dough for 2 minutes until a ball is formed. (If you do not have a mixer with a dough hook, you can knead by hand for 10 minutes.)
- Let rise. Place ball of dough into a large bowl greased with oil. Cover loosely with a towel. Set in a warm place (80˚- 90˚F air temp) for 1 hour to let rise.
- Punch down dough. After an hour, remove towel and punch down dough.
- Gather and place dough in pan. Gently gather the dough and without pressing into it, place the dough into a greased loaf pan. I place the dough punched side down in the bread pan so that top stays more smooth.You can let the dough rise a second time in the pan or skip the second rise and go right to baking. See notes for the instructions for the optional second rise.
- Bake in a preheated oven at 375˚F for 30 minutes.
- Let cool. Remove loaf from oven and let cool on a cooling rack or cutting board. Slice and serve warm or toast each slice. Best enjoyed buttered. Try adding jelly as well!
Video
Notes
- You can let the dough rise a second time (called proofing) which can add a softer, more flexible texture and a more bready flavor. A second rise can also smooth out any imperfections that happen when you gather the dough. The second rise completely optional.
- If you'd like to give your dough a chance to rise a bit more after you've gathered and placed it in the greased bread pan, simply cover loosely the whole pan with plastic wrap and let the dough sit in a warm and ideally moist place for an additional 20-30 minutes then gather the dough and bake as directed. If you spray a little oil on the plastic wrap, this will help prevent it from sticking to the dough.
- I use the microwave as my warm spot.
")


Nancie says
This is the best bread recipe. It was very easy to prepare, came out great. Loved the hint of sweetness and richness of using milk.
Marnette says
Very good bread
DeMaris says
I have never made bread before! This recipe is great-it made me look like a pro. 🙂 Ive used bread flour, AP flour and a mix of both. Ive also used it as a base for cinnamon rolls. 5 stars for sure.
Linda says
Thank you for your great recipe. I added a couple of extra ingredients 2 tablespoons of mixed seeds & 1 egg. I reduced the milk by 2 tablespoons to compensate for the egg. I also prepared the dough in the bread maker, then I removed the dough & lightly kneaded it (I found the dough a little dry so I sprinkled some water over it while kneading) before placing in the loaf tin to rise. Was delicious. This recipe is a keeper.
Ingrid says
I made this recipe but used bread-making techniques that I am more used to. I like the extra flavor and texture in breads that develop for at least a few hours. I used all the milk, all the yeast, and 1/2 the flour to make a sponge during my lunch while working at home. At the end of the day, I had a silky sponge that, surprisingly, it smelled strongly of beer. Then after work, I added the other ingredients. It needed extra moisture so I added a few tablespoons of water. I live on top of a mountain ridge and need to adjust moisture in breads sometimes (altitude impacts relative humidity.). I put it in an oiled pan and I set it outside in the warm summer sun (with a damp cloth on top) and it proofed completely in 1/2 hour. Some of the folks who are having a hard time, may just need to keep playing with ratios and adjusting until they know what modifications they need to make for their local humidity, altitude, ambient temperature, the brands of flour they use, and their specific oven. Baking in the Midwest, where I lived most my life, was very different from baking in the south is. Angela gave us a lovely template, but a recipe is a guide to creating a similar outcome, not an exact science. If you feel something is off, it is OK to go off-script and make it work in your specific environment. Don't let a recipe make you second guess yourselves.
Angela G. says
Hi Ingrid, thanks for taking the time to share your bread-making tips. I really appreciate it and I'm sure readers of this recipe will too!
Doug says
I was wondering why this recipe doesn't specify a second rise in the pan after the shaping stage but before the baking stage.
A commenter named Debra asked on 4/19 if a second rise was required, but I didn't see a definite answer in your response to her.
Thanks in advance for the clarification!
Angela G. says
Hi Doug, this recipe does not require a second rise. The shape is what is it when you gather the dough and place it into the pan so you have to be a bit careful handling it if you're wanting a smooth top. I hope this helps! If you have any other questions, please let me know!
Hannah f says
😂here let me do everyone a favor. this bread was looking horrible if I only did one rise. Here’s a tip heat the oven up to be warm and do the second rice for an hour in a warm oven. The bread should rise perfectly fine.🙌🏻
Barb says
Hi Angela G.,
I just wanted to let you know that I made this bread in my bread machine. I followed directions for my bread maker--liquids first and made a well in the center of the flour for the yeast.
I also added about 3 tablespoons of softened butter. Nice smooth dough--I put it in a greased 9x5 inch bread pan and let it rise in the pan until doubled & baked it on convection bake. I set it at 340 (preheated) which my oven converts to 315 for about 34 minutes. It was really delicious! I could imagine it would make great French toast or bread pudding. Thank you for a yummy bread recipe. I just ate a piece with butter.
Angela G. says
Hi Barb, thanks so much for sharing the bread machine instructions and tips. I'm really glad you enjoyed it!
Georgianna says
Turned out great the first time I made it. Easy peasy!
Angela G. says
Awesome! So glad you enjoyed it, Georgianna.
Cindy Warren says
Bread is not rising enough but I had to use all purpose flour. The yeast is brand new and not expired. Could the all purpose flour prevent it from rising? My house temp is about 77 degrees.
Angela G. says
Hi Cindy, All purpose flour should work just fine. And the temperate of your house doesn't seem too cool although maybe putting it in a warmer spot might help speed it up. You can preheat your oven to 200˚then turn it off and put the dough in the warm oven. It could be that the yeast was not activated. Did you heat milk enough before you dissolved the yeast into it?
Nadia says
Fantastic and yummy recipe! I love that it was easy to make and your directions were great! This was my first attempt at making bread and this has inspired me to try more recipes. Thank you!
Angela G. says
Hey Nadia, I'm so glad you enjoyed this recipe and that you've gained some confidence in the bread-making world. That makes me so happy! 🙂 Keep it up, girl!
Denise Hines says
My husband and I made this bread. It was very easy to make and came out wonderfully. I cant wait to try some more of your recipes.
Angela G. says
Hi Denise, I'm so glad you both enjoyed my bread recipe and that you want to try more. Thanks for the kind words! Made my day. 🙂
Janice House says
Can this recipe be used in a bread maker
Angela G. says
Hi Janice, I haven't tried making this in a bread maker because I don't have a bread maker anymore. However, I believe this would work using the basic white bread setting. Or any setting that would allow the dough to rise for an hour. Please report back if you try it! I'm sure others have the same question. Thanks for asking. 🙂
Sue says
This looks delicious. I have a jar of active yeast rather than packets. Do you have any idea how much is in a packet? looking forward to making this 🙂 Thanks!
Angela G. says
Hi, Sue! One packet is equal to 2 and 1/4 tsp of yeast. Thanks for asking! Hope you enjoy the recipe. 🙂
Sue says
Thanks Angela 🙂
Debra says
Directions are not specific. Do you let it rise a second time? Mine is terrible. And I followed to a T. Looks like you’re more interested in monetizing your site.
Angela G. says
Hi Debra, I'm sorry yours did not turn out. It sounds like maybe yours did not rise properly? I would need to know more before I could help figure out what happened. But if you followed the directions exactly, and read the tips I included in the post, the only thing that can really go wrong is the yeast not activating. Yeast not activating is usually due to the yeast being expired. If you want to provide more info or upload a photo of your bread, I'd be happy to try to help more.
Kathy says
Delicious and SO easy! Thank you!!
Angela G. says
Hi Kathy, I'm so glad you enjoyed it! Thanks for the feedback!